Make an immigration and asylum appeal using MyHMCTS
Updated 15 October 2024
1. Before you start
This guide is for legal professionals. Before you can start an immigration or asylum appeal using MyHMCTS, you need to:
- set up an HMCTS Payment by Account
- register your organisation with MyHMCTS
- set up a MyHMCTS user account
Please read the MyHMCTS guidance for further information and instructions.
Once you have a MyHMCTS account, you can sign in using your email address and password.
Visit MyHMCTS: how to complete case administration tasks for guidance on case administration tasks, such as:
- sharing a case
- assigning a case
- filing a notice of change or acting
2. Start your appeal
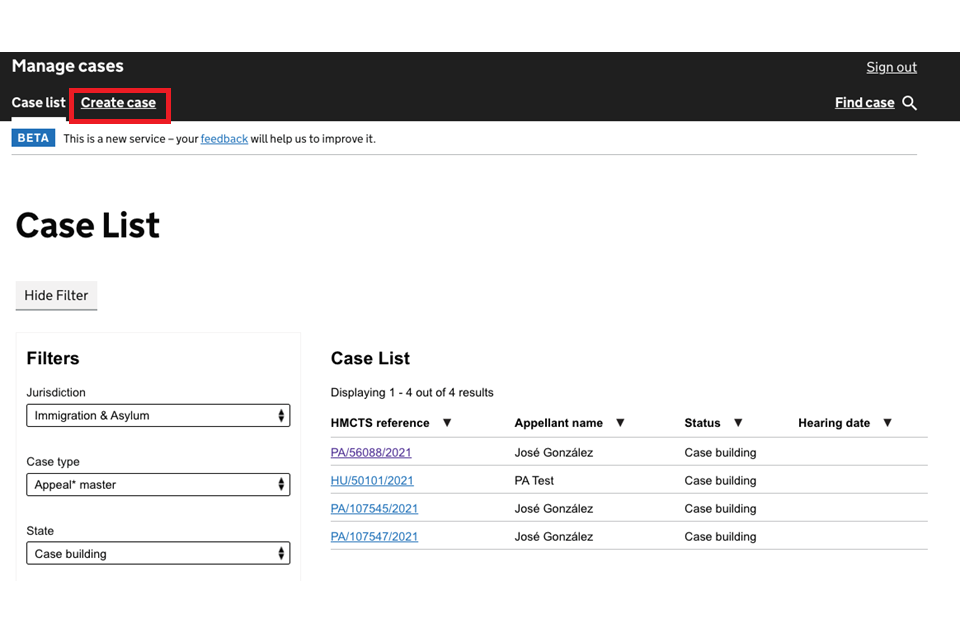
Once you have signed in to MyHMCTS, you will see your case list – this will be empty the first time you sign in. Start an appeal by selecting ‘Create case’.
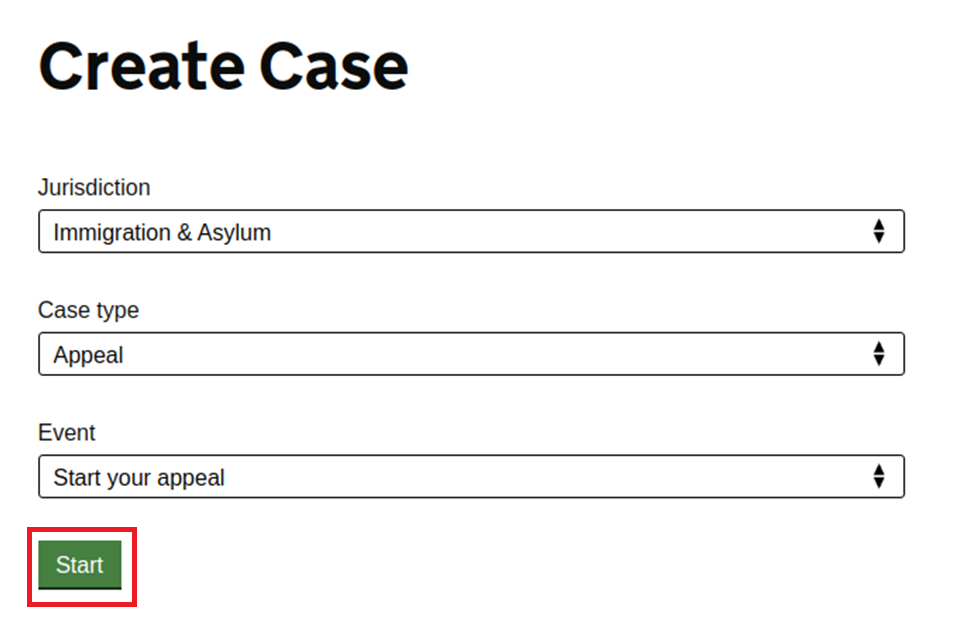
Use the drop-down boxes to select the jurisdiction (‘Immigration and Asylum’), case type (‘Appeal’) and event (‘Start your appeal’). Once all are selected, select ‘Start’.
Enter your client’s details
You will need to confirm your client is eligible to appeal by answering a set of screening questions and selecting ‘Continue’.
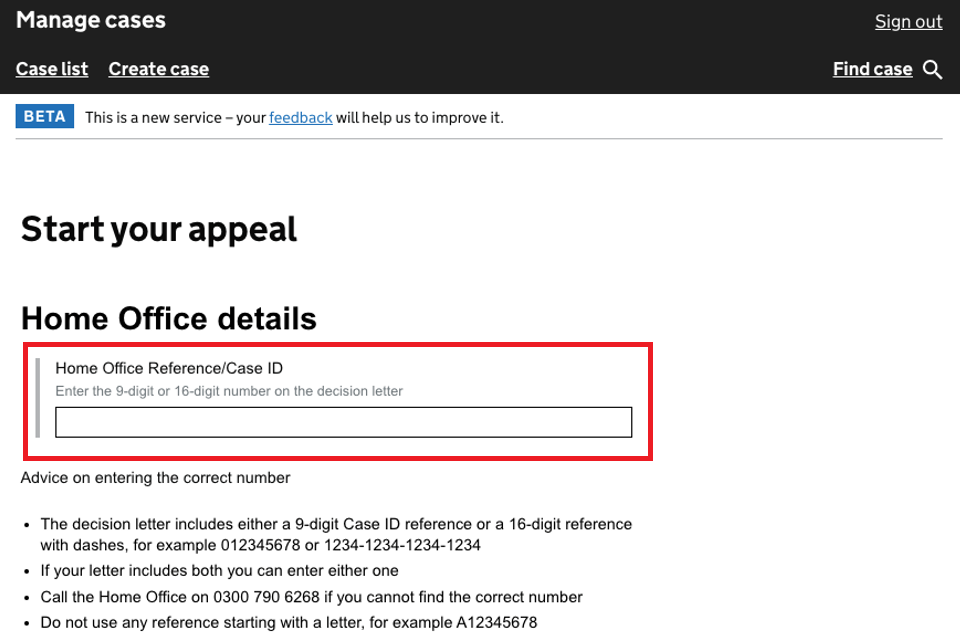
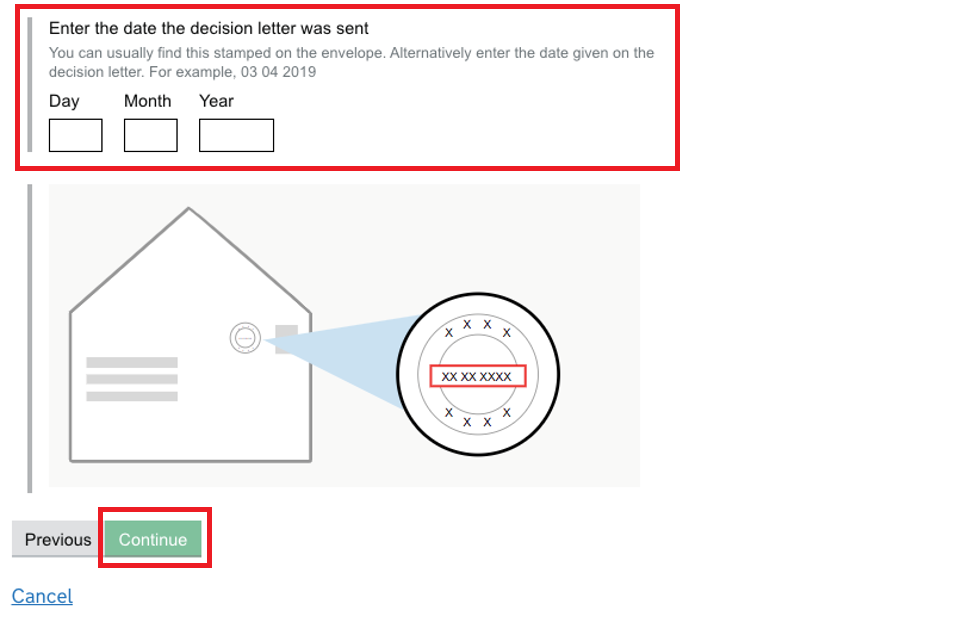
You will then need to enter the reference number and date shown on their Home Office decision letter.
Enter your client’s name, date of birth and nationality. If your client has more than one nationality you can select ‘Add new’ for each one. Select ‘Continue’.
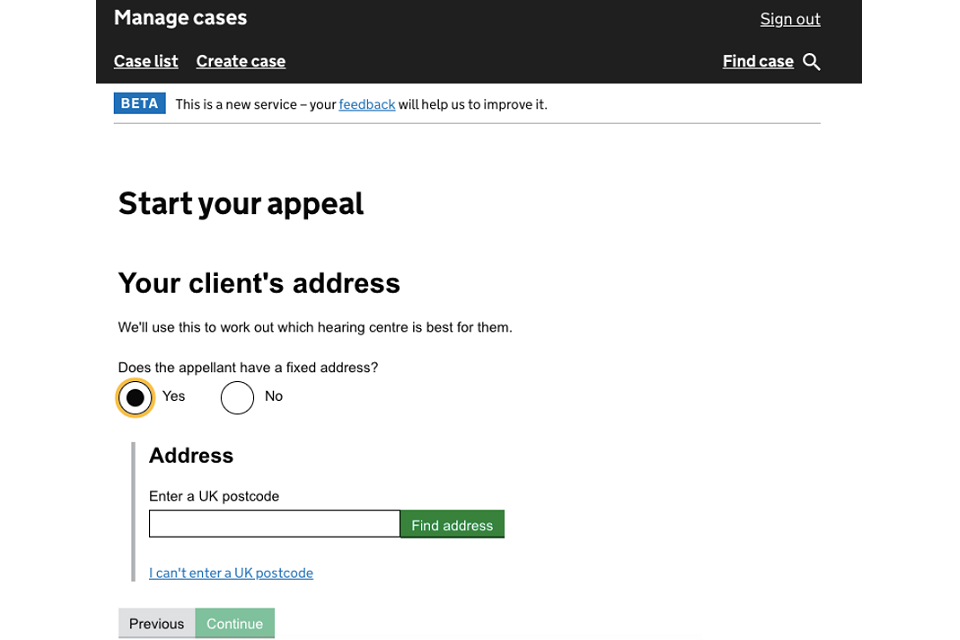
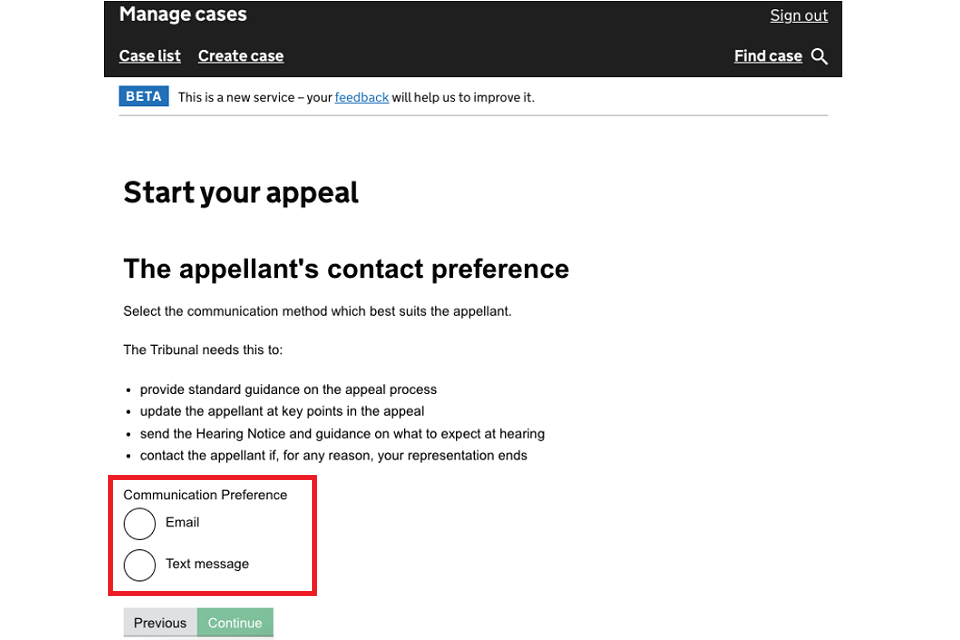
On the next 2 screens enter your client’s address and then contact preferences. We will not contact your client directly, but may need to in future should your representation end.
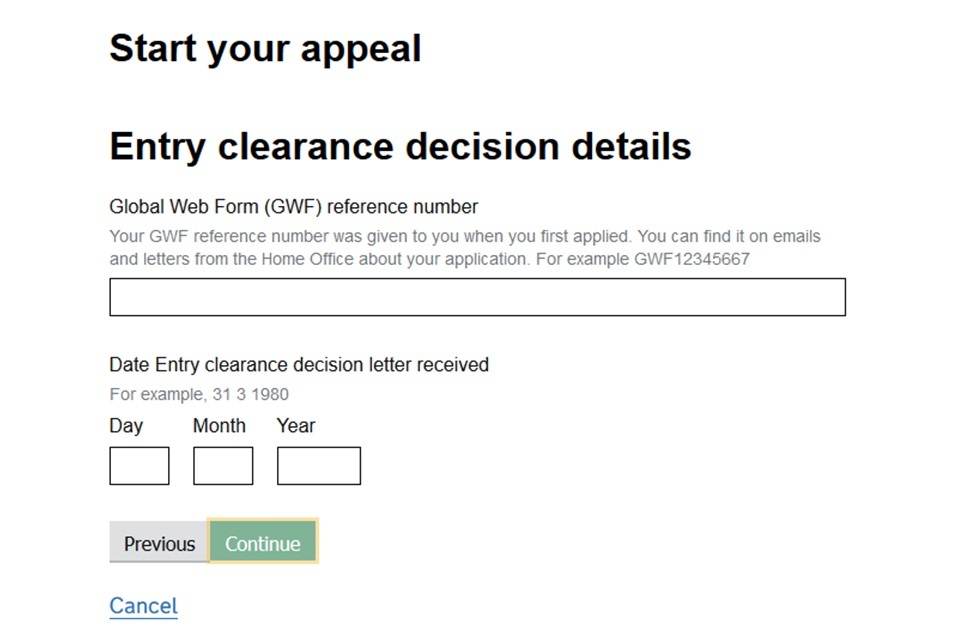
Out of country appellants may be asked to provide the ‘entry clearance decision details’. Find the Global Web Form (GWF) reference number on emails and letters from the Home Office to your client about the appeal.
Select the type and grounds for appeal
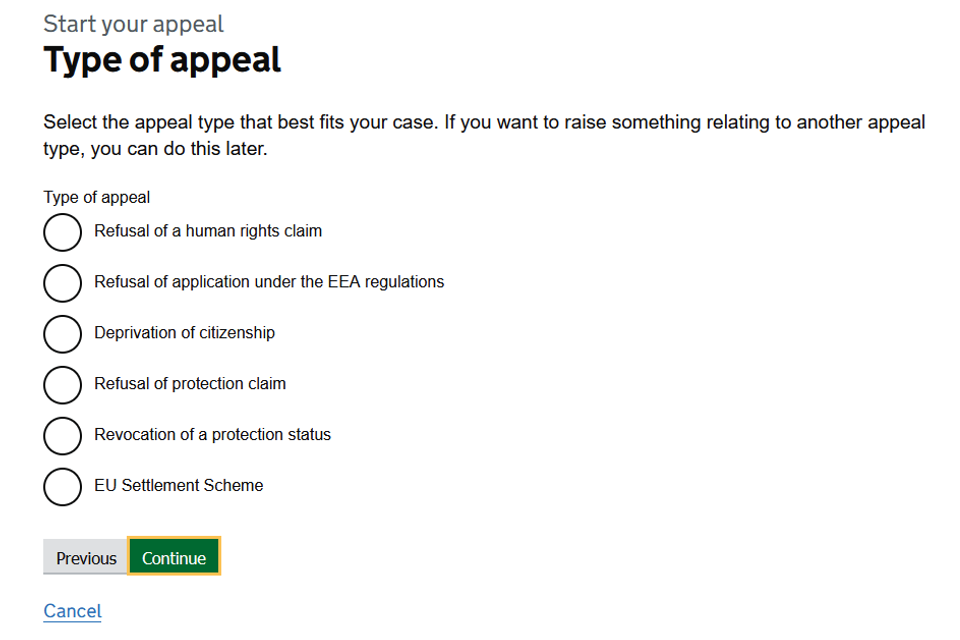
Select the type of appeal that best fits your case. If you want to raise something relating to another appeal type, you can do this later.
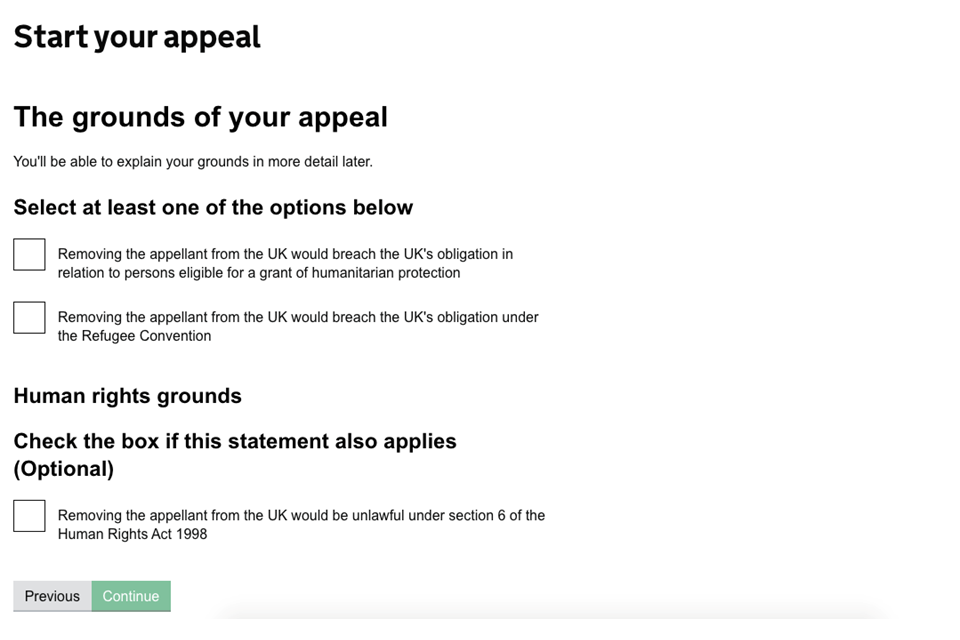
Enter the grounds for your appeal and include any ‘new matters’ that have arisen since the original application; for example, your client may have had a baby in the intervening time. The Home Office must accept any new matters for consideration.
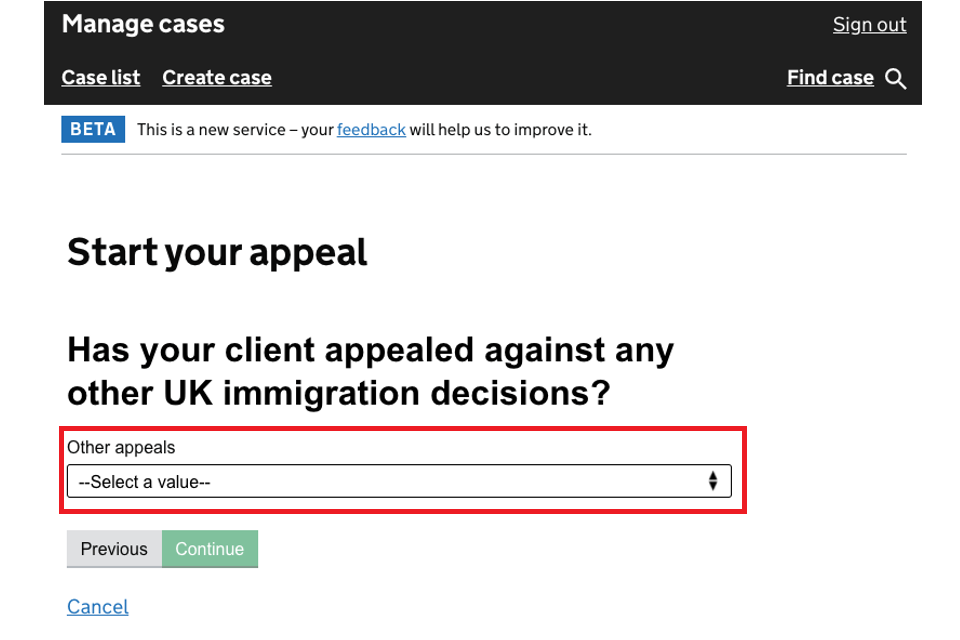
Tell us if your client has appealed against any other immigration decisions using the drop-down menu.
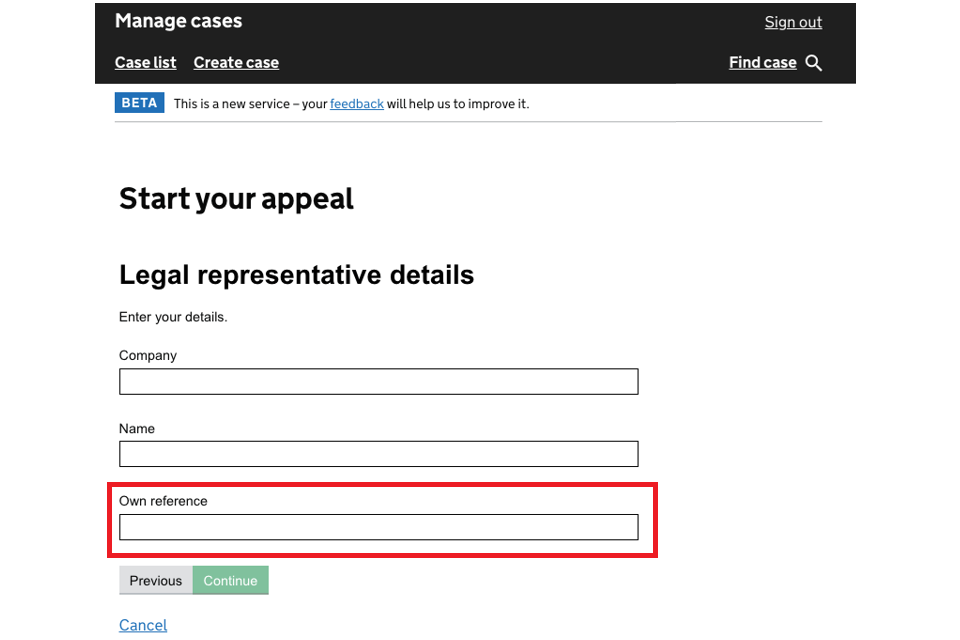
The next screen has the option to enter your own reference number for the appeal. We will use this on any correspondence with your firm.
Submit your appeal
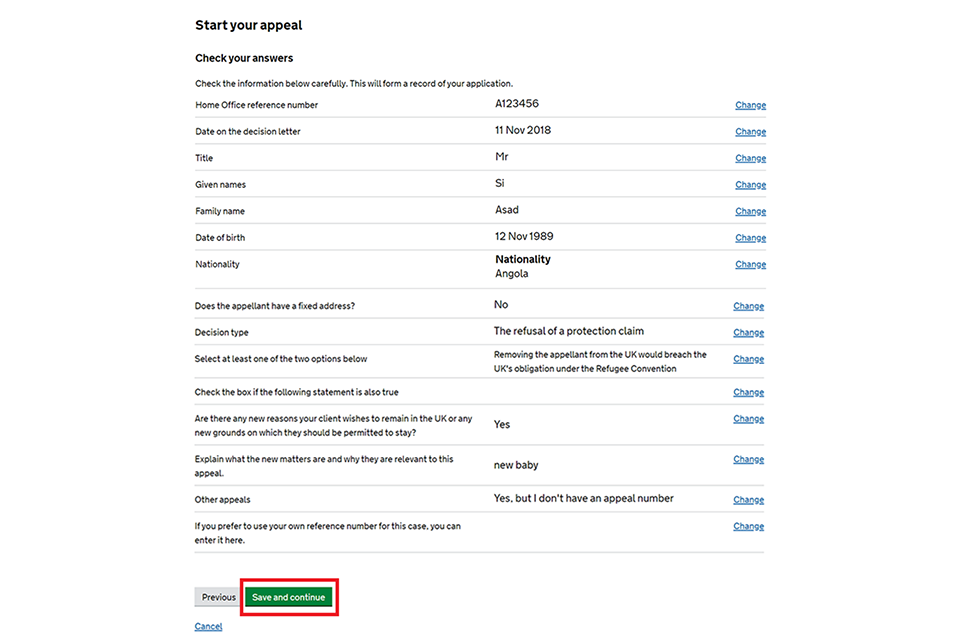
Check your previous answers are correct before selecting ‘Save and continue’. This will save your appeal. The appeal is not submitted yet and you can still edit the details you’ve provided by selecting ‘Edit appeal’.
When you’re ready to submit, select ‘Submit the appeal’, tick the declaration statement and then select ‘Submit’. Your appeal will be formally lodged and a confirmation screen will show the current progress of the case.
Submitting your appeal will send an automatic email to the Home Office, asking them to upload their evidence. The time they have to do this will depend on the circumstances of your case. You will receive an email from us when it is ready to view.
Late appeals
If you submit your appeal more than 14 days after receiving the Home Office decision letter (or 28 days if you are appealing from outside the UK) you will see a message saying that you have missed the deadline.
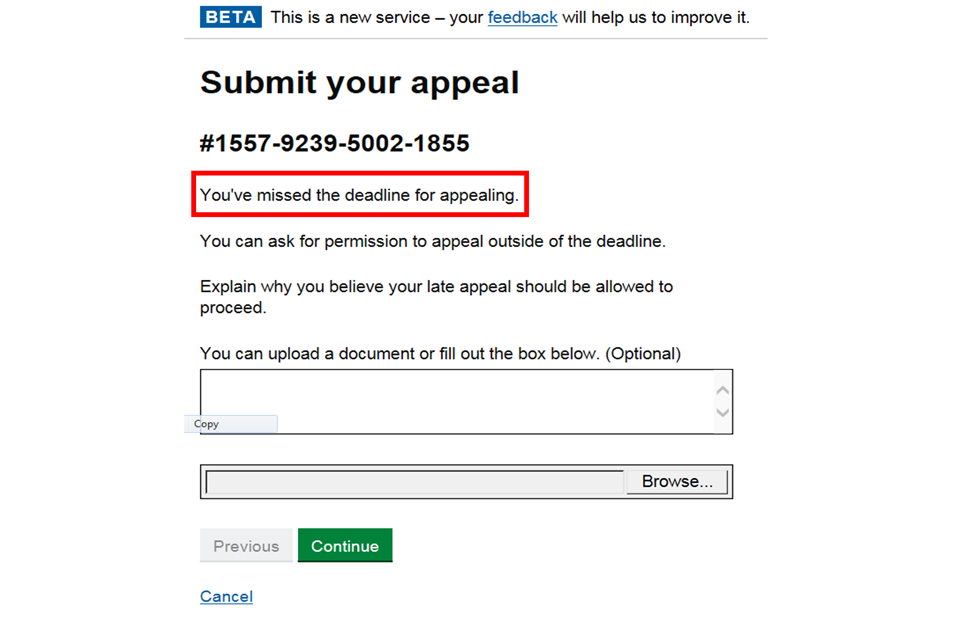
Below this is a box where you can fill in the reasons for the late appeal and upload a supporting document or file.
After considering this information, we will email you to say whether the appeal can go ahead.
3. Build your case
Before your appeal can progress you will need to build your case by writing an ‘appeal skeleton argument’ (ASA) and uploading supporting evidence. We will let you know the deadline for doing this in an email.
Write your ASA
You should write the ASA using the template provided on the ‘Build your case’ screen.
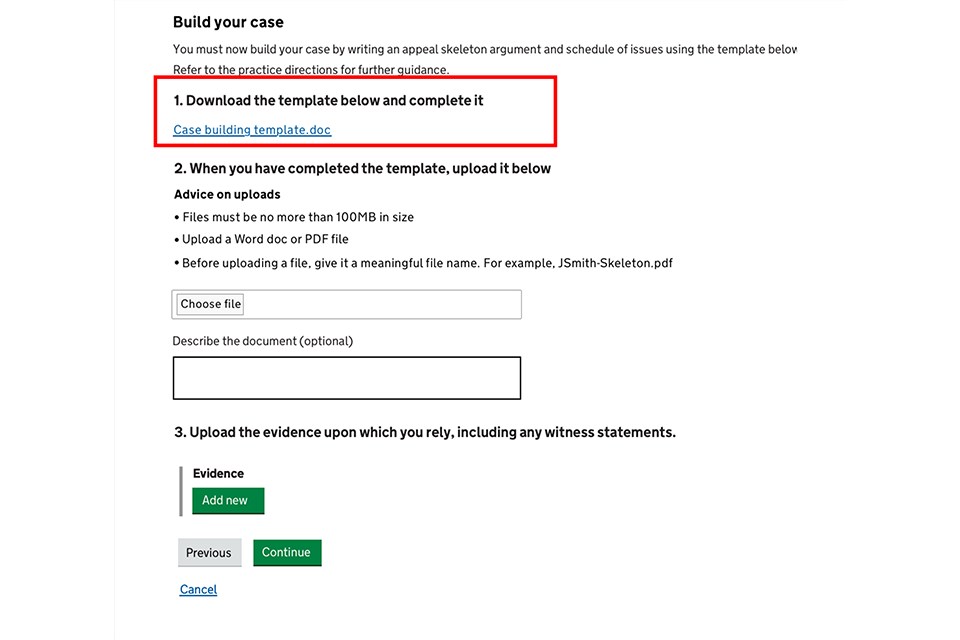
The ASA must contain:
- a brief summary of your client’s case
- a schedule of issues
- your client’s reasons for disagreeing with the decision, in enough detail for the challenge to be understood
Upload documents
Upload the ASA following the on-screen instructions on file type and labelling.
Next, you must upload your evidence, including any witness statements. You can upload this as one document, so long as it’s paginated, or as separate documents. Select ‘Continue’.
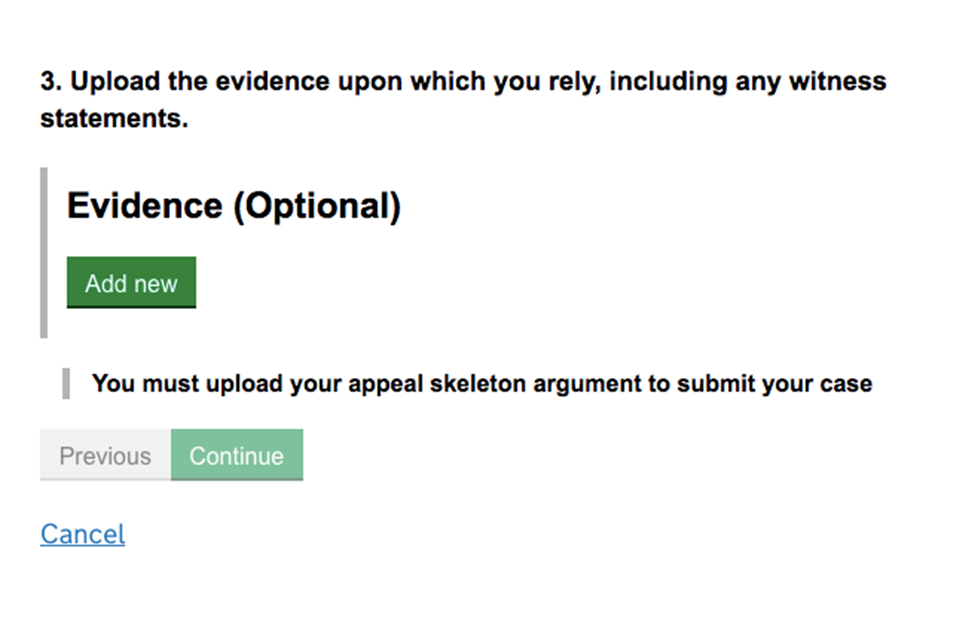
You will then see a screen showing a list of the documents to be uploaded. Select ‘Upload’ or ‘Change’ to amend a document.
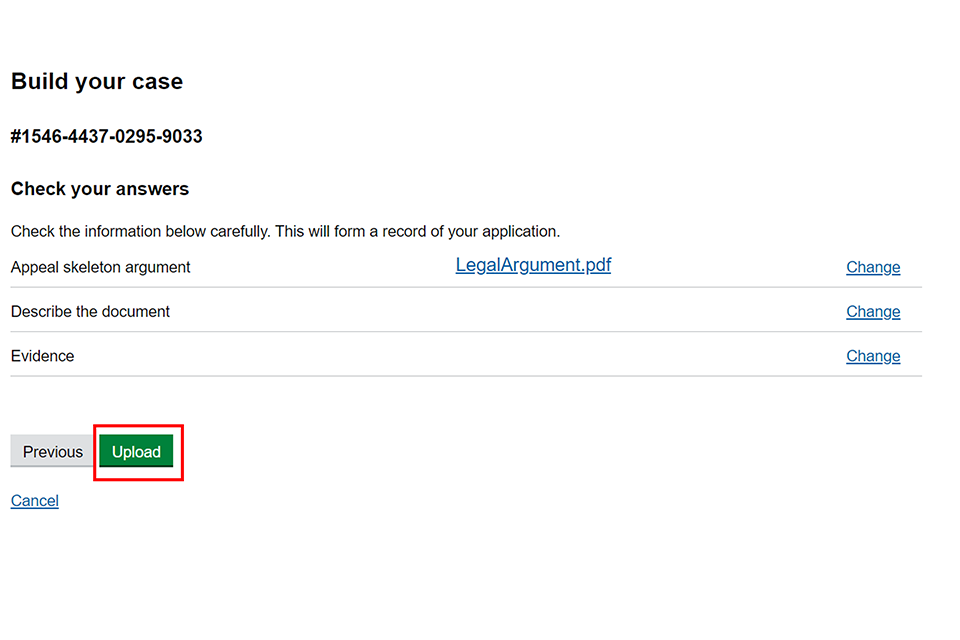
Once a document is uploaded it is saved in the system but not sent to us; make sure that you submit the document by following the next step.
4. Submit your case
If you are ready to submit, select ‘submit your case’. Alternatively, select ‘build your case’ to add more evidence.
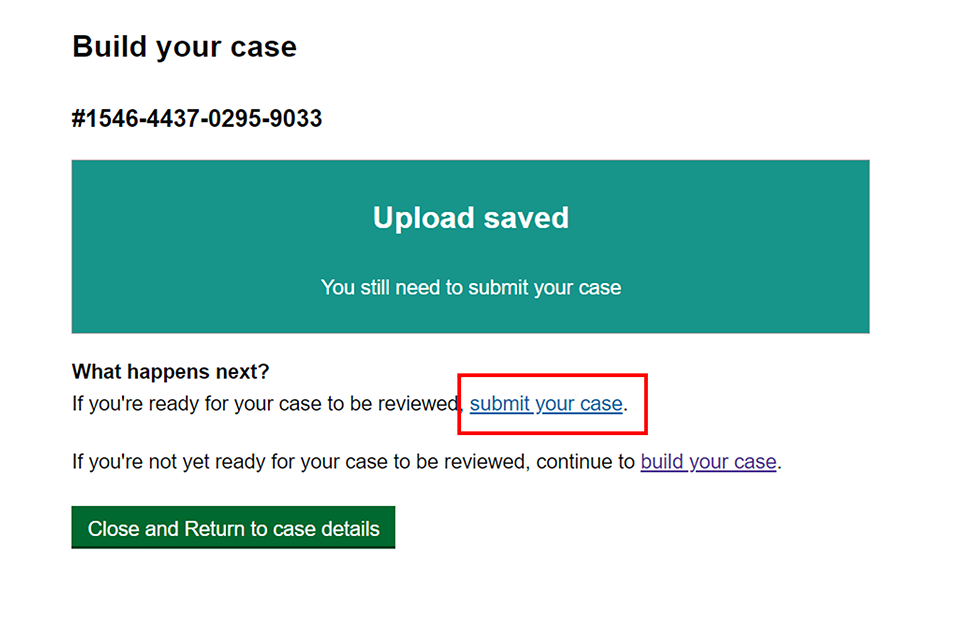
Once your case has been submitted we will review the documents. If they meet the requirements we will forward them to the Home Office. If they do not we will advise you on how to format them correctly.
The time the Home Office has to respond after receiving the documents will depend on the circumstances of your case.
Add additional evidence
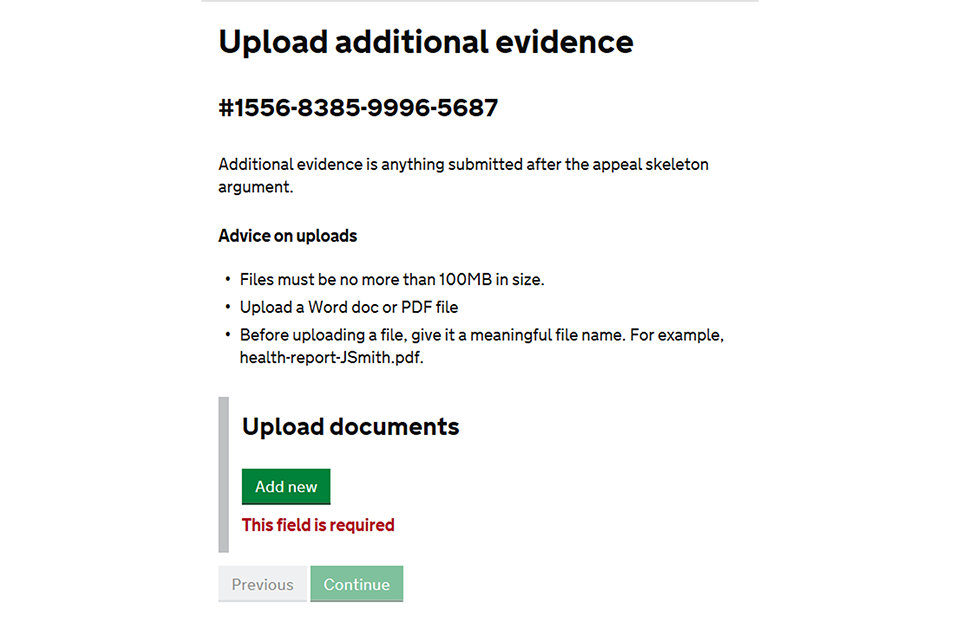
You can submit additional evidence after submitting your case. This could be in response to the Home Office review or additional information provided by the client.
Select ‘add additional evidence’ and follow the same upload process as in step 3.
5. Ask for an urgent appeal
You can ask for an appeal to be heard urgently at any point during the appeal process. This is sometimes known as an ‘expedited’ appeal.
It’s free to ask for an urgent appeal. The appeal application fee (if your client needs to pay one) must be paid before the request can be reviewed.
You will need to:
-
tell the tribunal the reason why the case should be heard urgently
-
give evidence of compelling or compassionate grounds, for example letters from a doctor or hospital
A judge will review the evidence and decide whether the application should be heard sooner than usual.
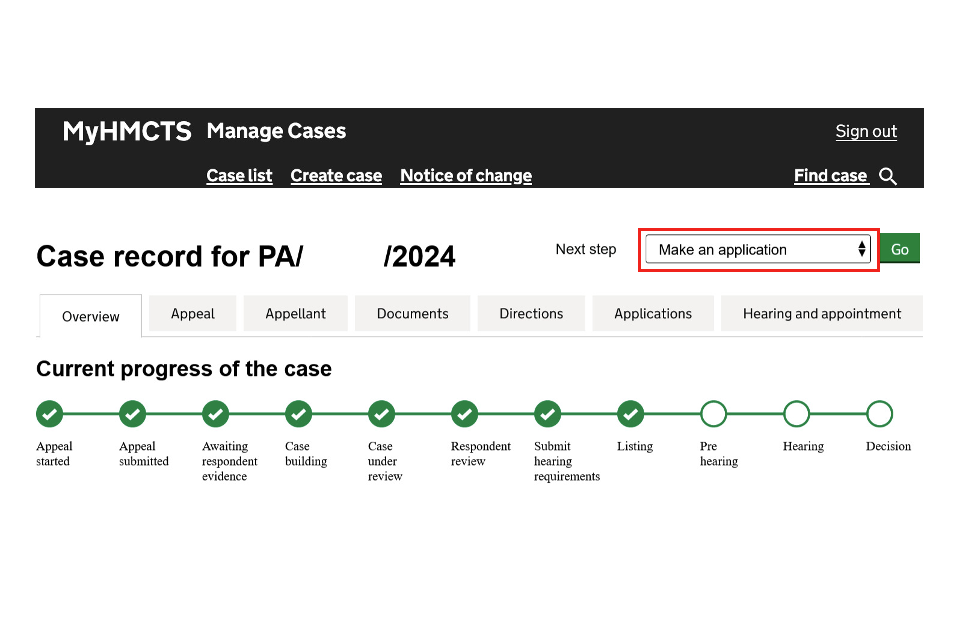
1. Select ‘Make an application’ from the next step drop down menu. Then select ‘Go’.
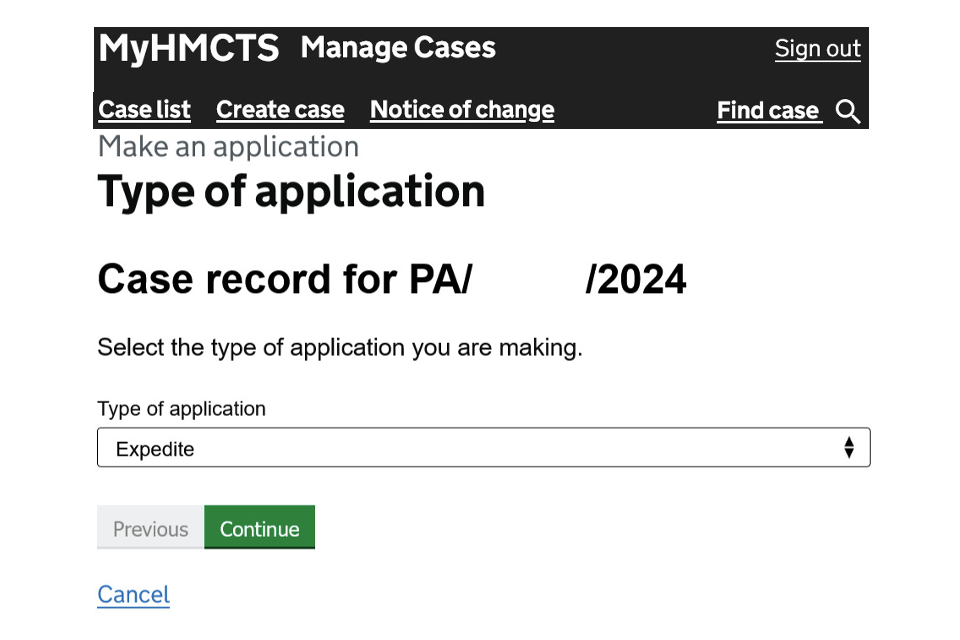
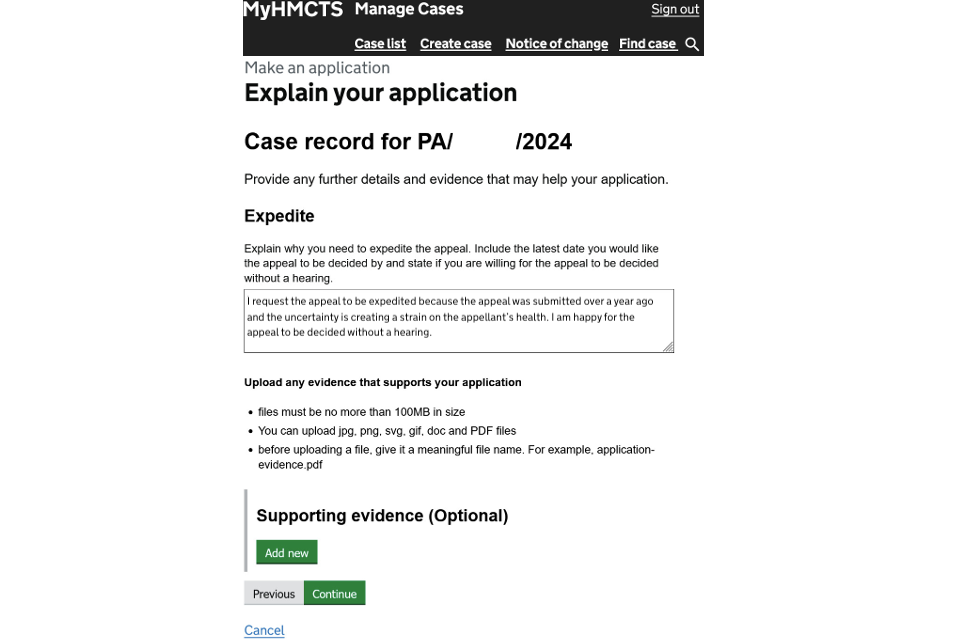
2. In the ‘Type of application’ drop down, select ‘Expedite’. Then select ‘Continue’.
3. Explain why you need to expedite the appeal in the textbox.
4. Select ‘Add new’ to upload any supporting evidence.
5. Select ‘Continue.
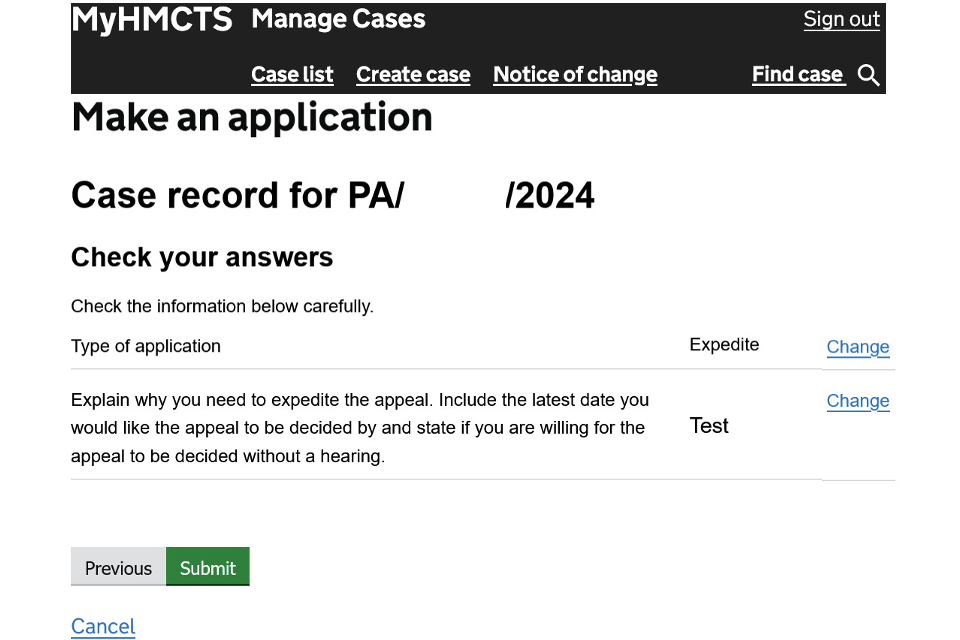
6. Check that the information you’ve entered is correct. If you need to change and answer, select ‘Change and enter the correct information.
7. Once you have checked your answers, select ‘Submit’.
6. Prepare for a hearing
If a case is going to a hearing, you will be asked to submit any adjustments needed by the appellant, for example interpreter services.
Before the hearing, all documents relating to the hearing will be combined in a ‘digital bundle’. You can view the bundle by selecting the documents tab.
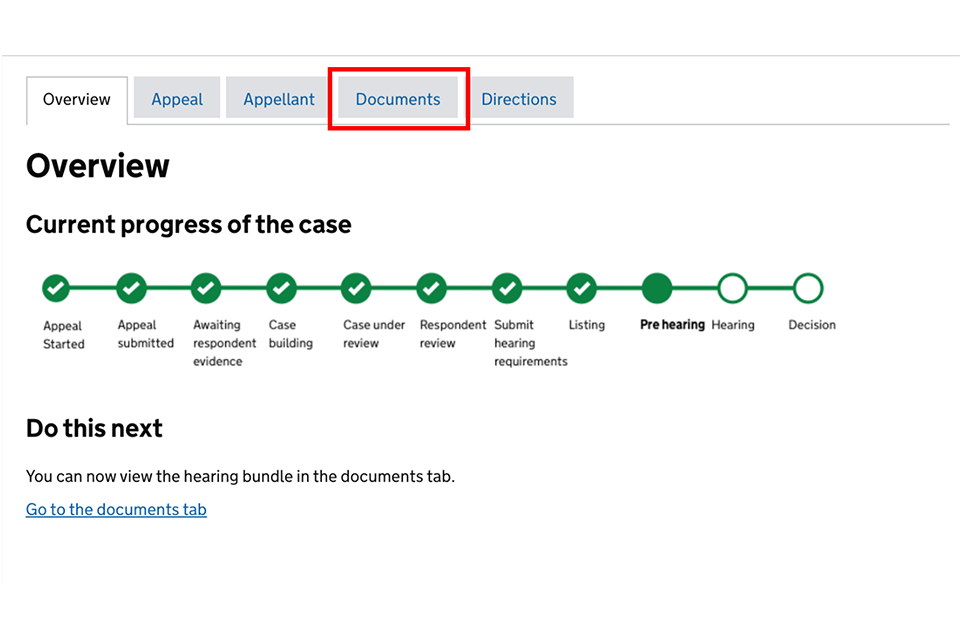
We will share the outcome of the hearing through the MyHMCTS system. You will receive a notification with the decision and you can access the judge’s full decision and reasons in the documents tab.
You may appeal the decision to the Upper Tribunal by selecting ‘apply for permission to appeal’ within 14 days. If you’re appealing from outside the UK you have 28 days to do this.
7. Make an application
1. In the ‘Next step’ drop down menu, select ‘Make an application’. Then select ‘Go’.
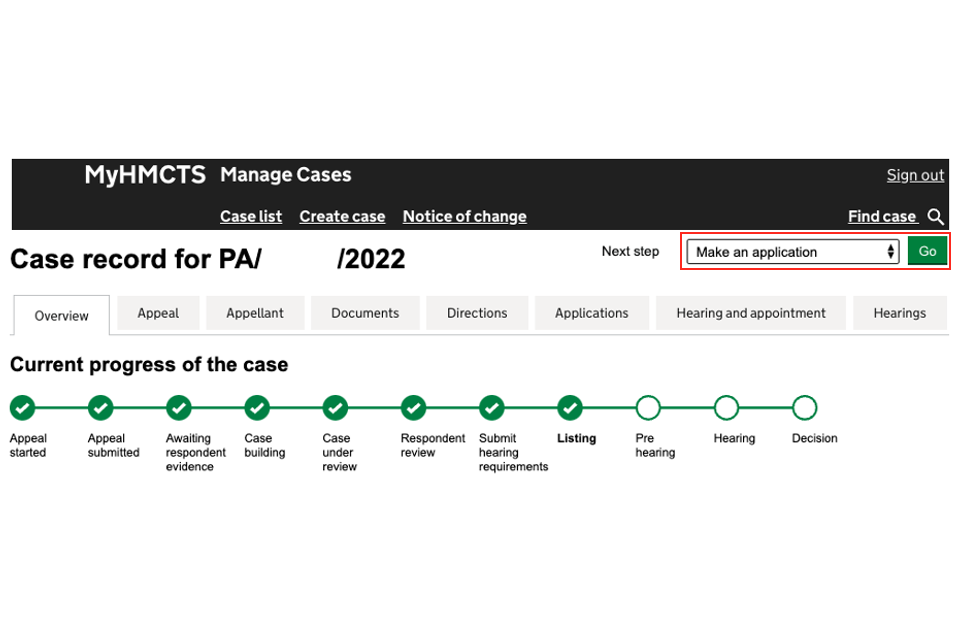
2. Select the application type you want to make. Then select ‘Continue’.
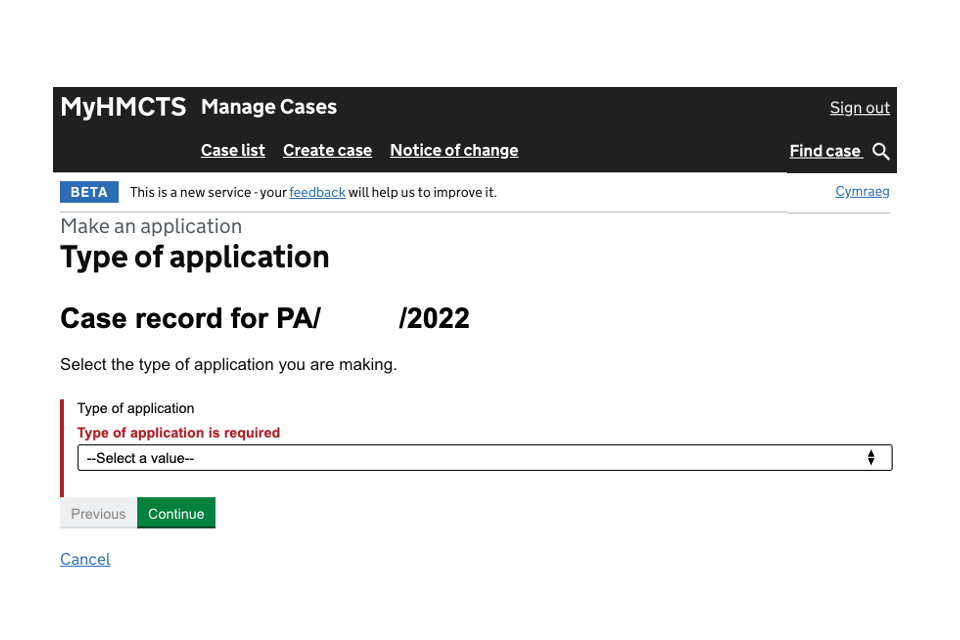
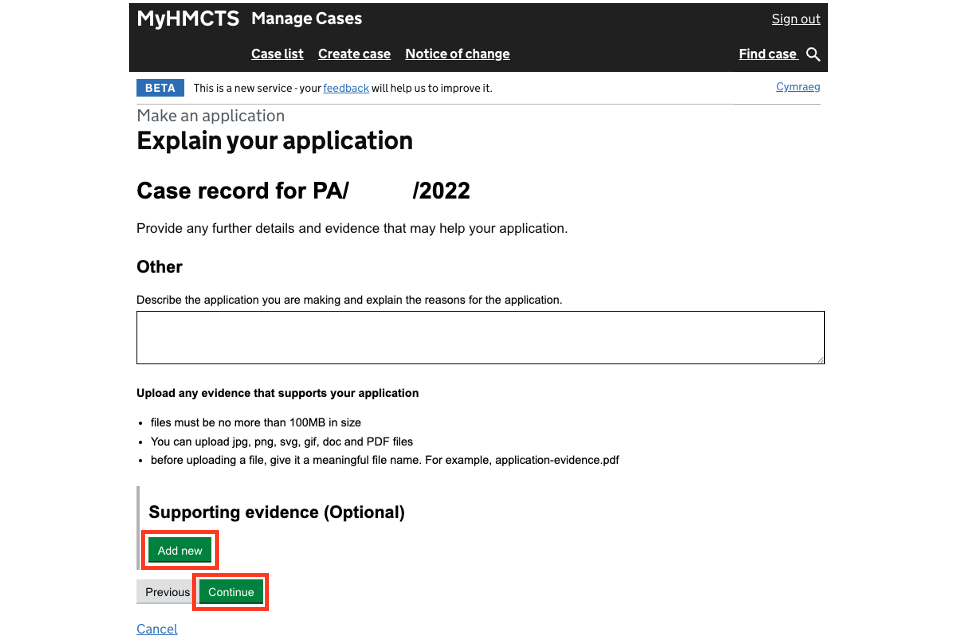
3. Use the text box to provide details to help your application.
4. Select ‘Add new’ to upload any supporting evidence.
5. Then select ‘Continue’.
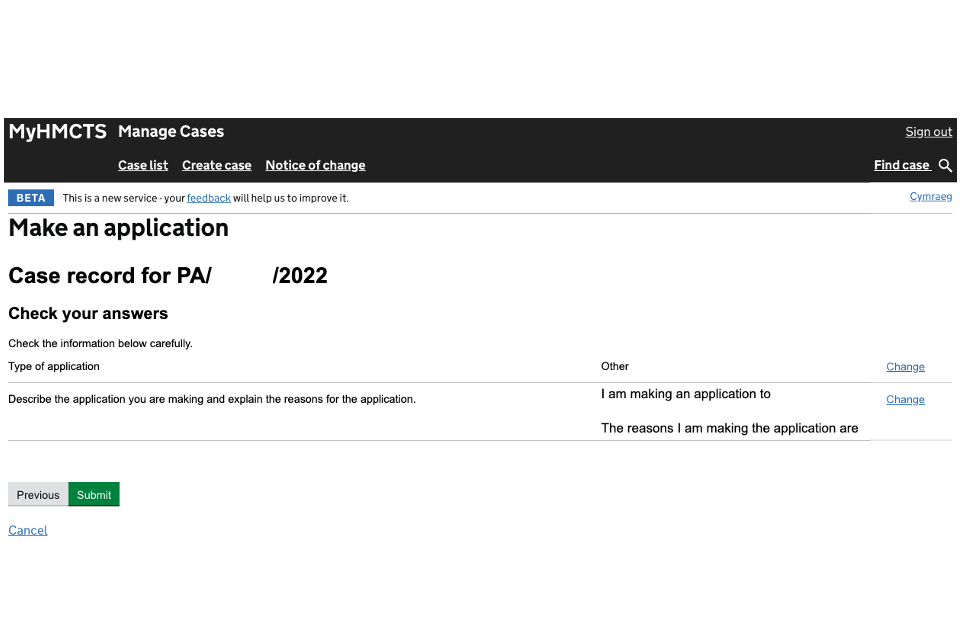
6. Check that the information you’ve entered is correct. If you need to change an answer, select ‘Change’ and enter the correct information.
7. Once you have checked your answers, select ‘Submit’.
If you’re making an application to set aside a decision, a judge will either refuse or approve the application.
If the judge refuses the application there will be no further action from the tribunal.
If the judge approves the application, they will update the appeal.
8. Apply for permission to appeal a First-tier Tribunal decision
1. Select ‘apply for permission to appeal’.

2. Select ‘Add new’.
3. Select ‘Choose file’ to upload a document that explains the grounds of the application.
4. Use the text box to describe what is in the document.
5. Select ‘Add new’ to upload any supporting evidence. Then select ‘Continue’.

6. Check that the information is correct. If you need to change an answer, select ‘Change’ and enter the correct information.
7. Once you have checked your answers, select ‘Submit’.

9. Get help with MyHMCTS
Managing cases and case access in MyHMCTS
If you need support with a particular case or with managing a case in MyHMCTS, email contactia@justice.gov.uk.
Find guidance for case administration tasks in MyHMCTS
Accessing your MyHMCTS account
If you are having trouble accessing MyHMCTS, make sure you are using the correct link. To manage a case, you must use https://manage-case.platform.hmcts.net.
You should also make sure you:
- check your internet browser is up to date – we recommend you use Google Chrome or Microsoft Edge (you cannot use Internet Explorer or Apple Safari)
- clear your cookies and your cache
- check your firewall and security settings
We recommend that you bookmark or favourite MyHMCTS in your internet browser. You should only create the bookmark or favourite once you have signed in and are on the homepage. Do not create it from the sign in or verification pages, or while you have a case or organisation open.
If you are still having trouble accessing MyHMCTS, try using a different device to sign in.
If you have an IT support team, they will be able to help with any device, browser and security issues.
If you have an issue with your MyHMCTS account, you should contact an account administrator in your organisation.
If you need additional support with your MyHMCTS account, email MyHMCTSsupport@justice.gov.uk. We aim to respond within 5 working days.
