IT specialists: automate processing of local plan consultation responses
Learn how to set up and turn on a Microsoft Outlook automation so planners can save consultation responses as a SharePoint database.
Applies to England
These instructions explain how to install the Microsoft Outlook automation. They include how to test, run and uninstall the software, which will help planners with automated consultation responses.
Learn more about the automation, including what it does and who can use it.
For planning team members, find out how to access and export your data.
Create a new SharePoint site
The first task is to create a new SharePoint site to store the email data.
A SharePoint site is a secure workspace for storing, organising, and sharing information within an organisation. This is where the email database will be stored and accessed from.
If the planning team already has one set up and you’d prefer to use that, skip to the ‘install the automation’ section.
- Sign in to the Microsoft 365 Copilot app and select Apps (image 1).
- Scroll down the page to find and select SharePoint. Its location will vary from user to user (cdproposed2).
- Select Create site on the start page (Image 3).
- Select Team site (image 4).
- Select Standard Team template (image 5).
- Select Use template on the preview page (Image 6).
- Name your site. For example, [Your LPA name] Local Plan Consultation Responses (image 7).
- A Site description is optional but highly advised (cdproposed5) (image 7).
- The Group email address and Site address will autofill based on the site name chosen though you can change this in the boxes provided, if necessary (image 7).
- Select Next (image 7).
- Set your site’s Settings (Image 8) - this screen may not appear based on user permissions.
- Set the Privacy settings as ‘Private - only members can access this site’.
- Set the Language to English.
- Select Create Suite.
- Add users to the site using their email addresses. Anyone you want to have access to the consultation responses will need access to the SharePoint site. Once added, members can be upgraded to owners using the dropdown below their name (image 9).
- Select Finish (image 9).
Screenshots used with permission from Microsoft.
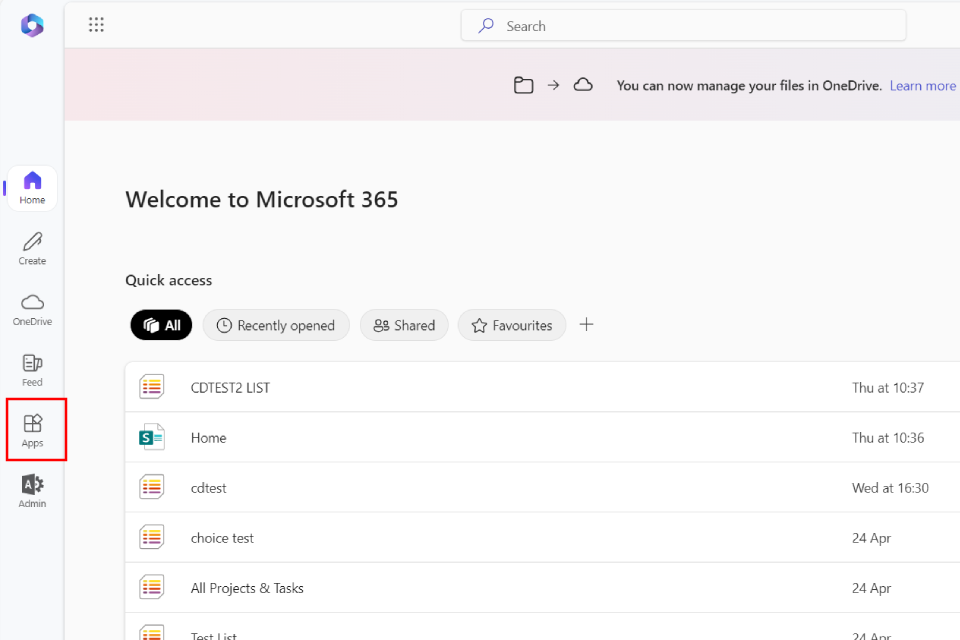
Image 1 – select Apps
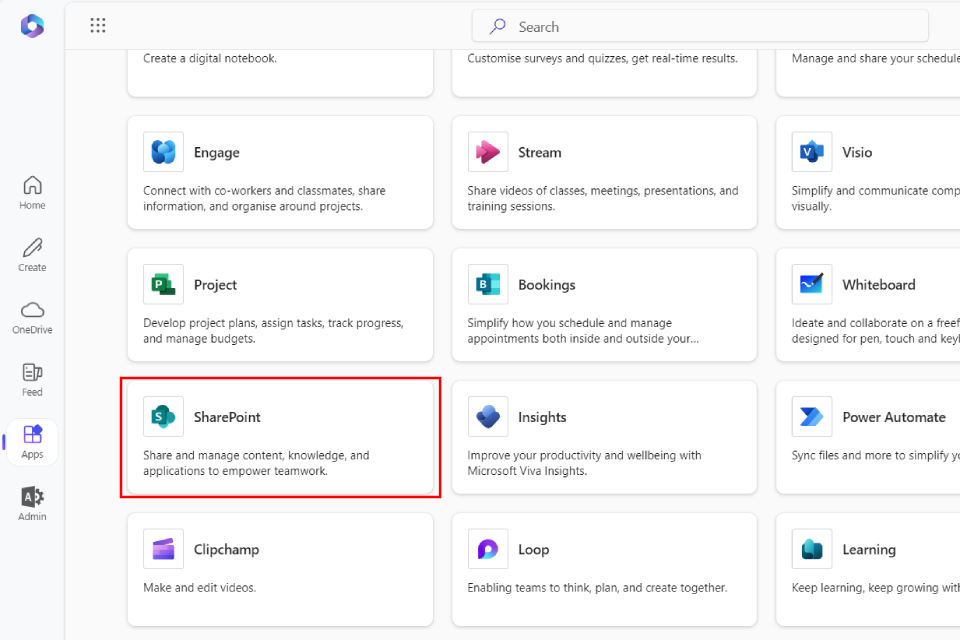
Image 2 – select SharePoint
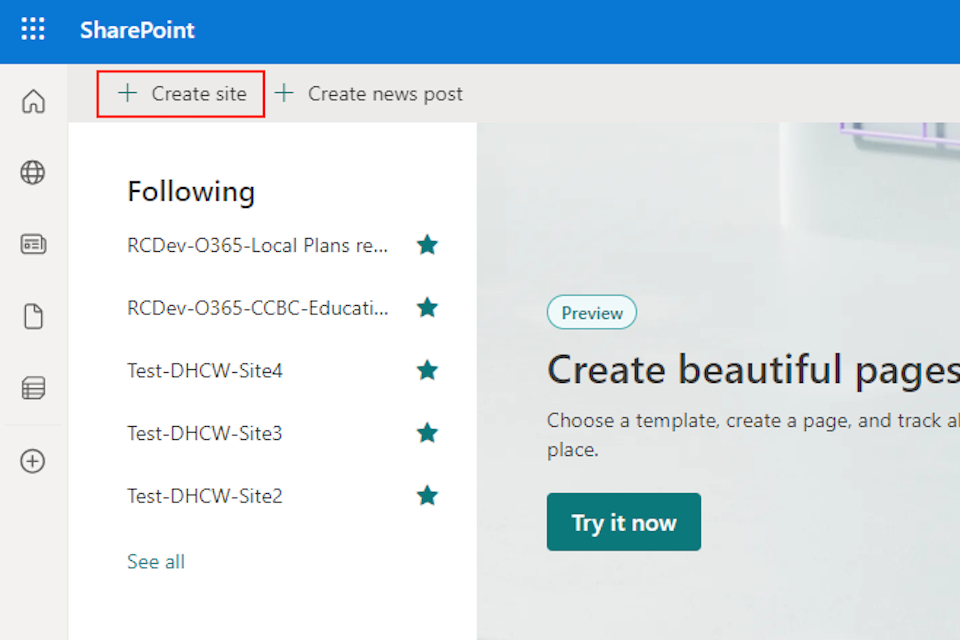
Image 3 – select Create site
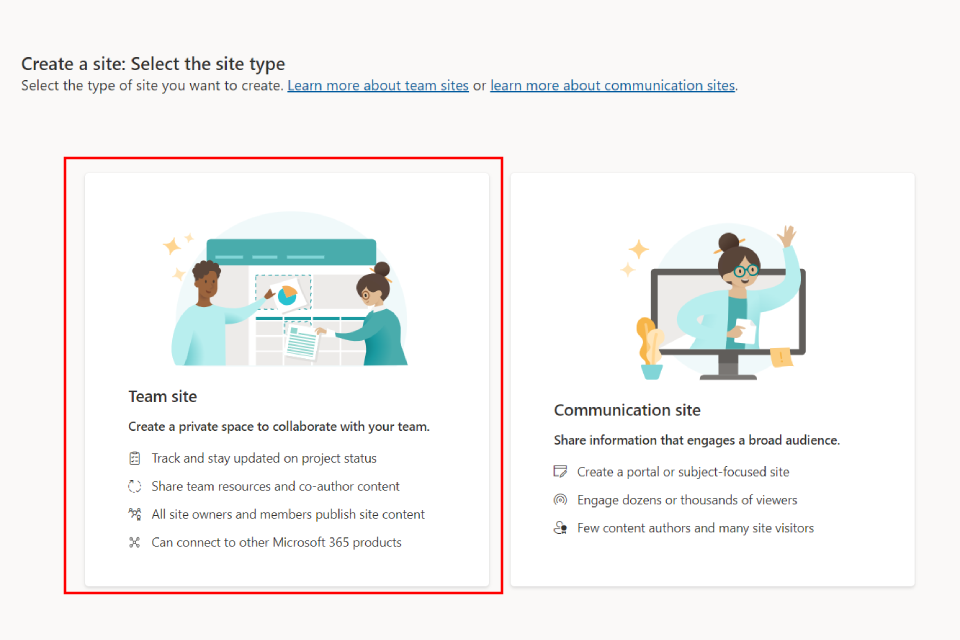
Image 4 – select Team site
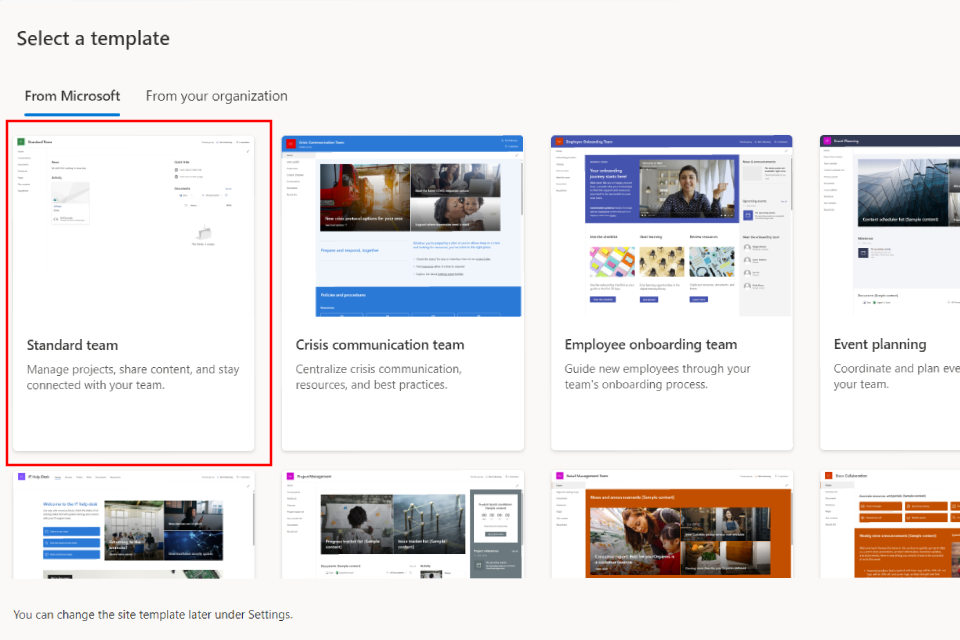
Image 5 – select Team template
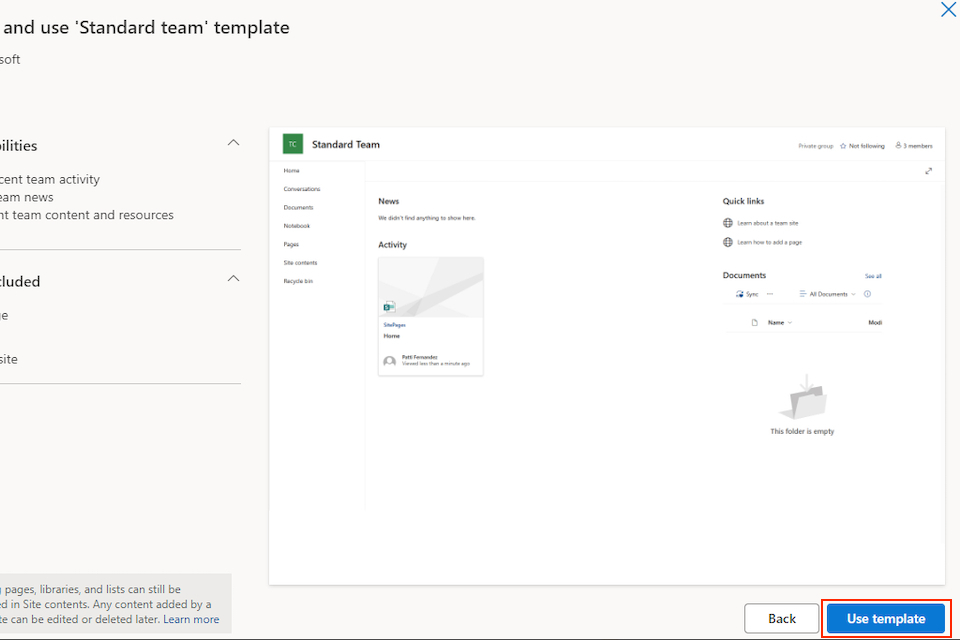
Image 6 – select Use template
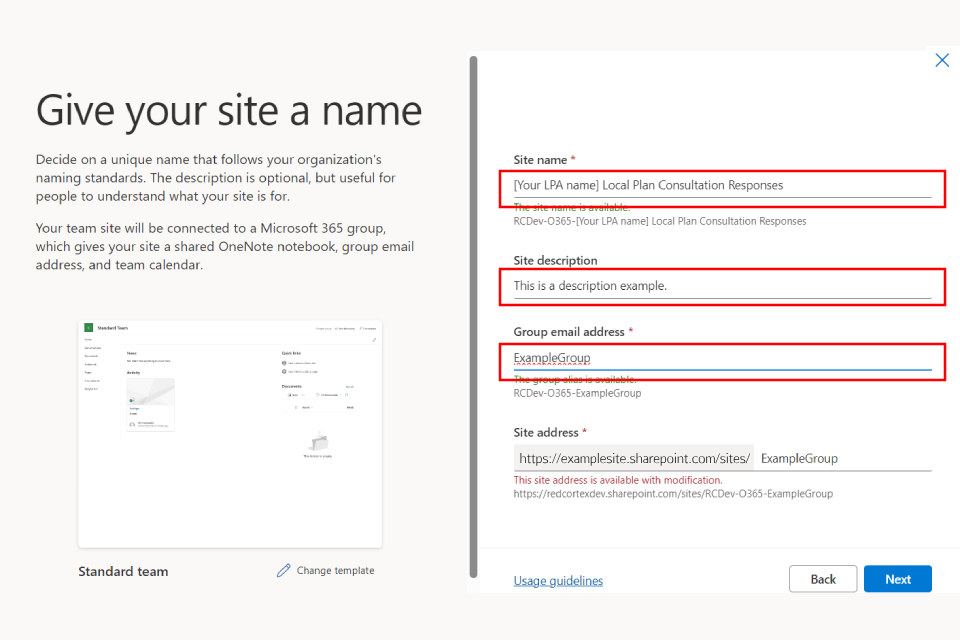
Image 7 – fill in the Site name and details
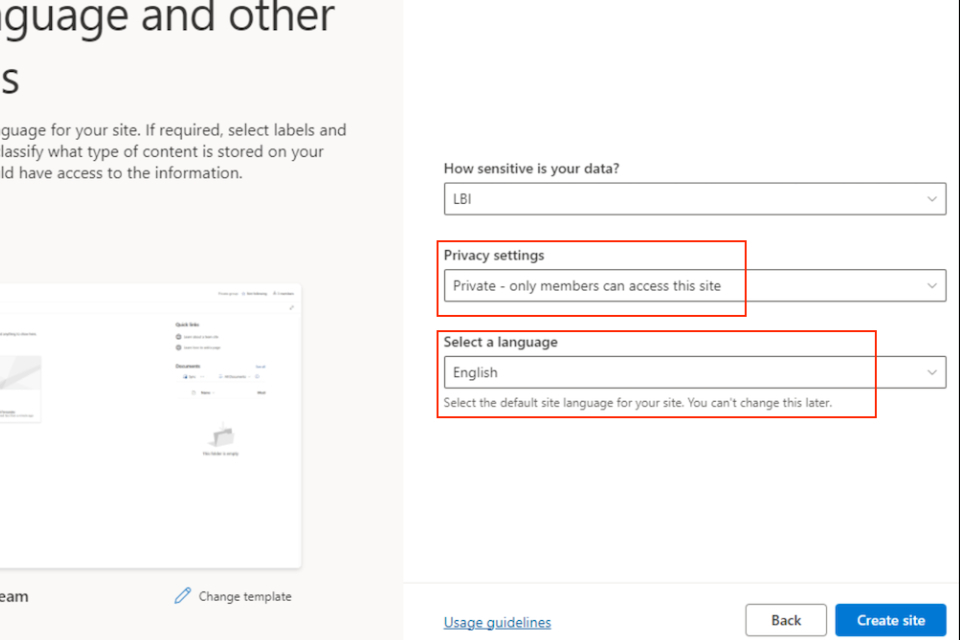
Image 8 - fill in the Site settings
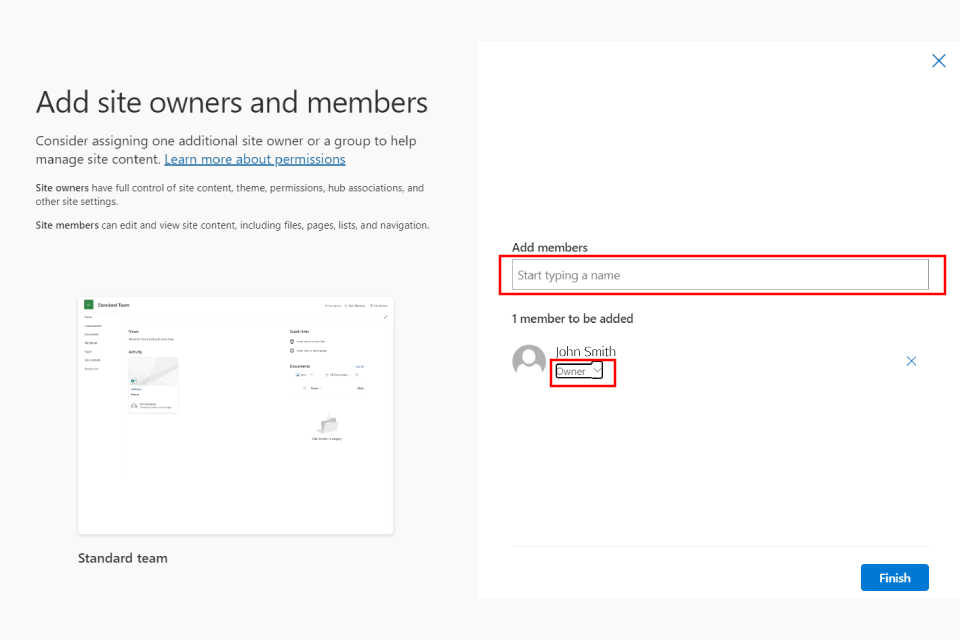
Image 9 – select Site owners
It might be easier to create a new SharePoint site for each consultation you’re running. For example, if you want to set this automation for multiple mailboxes, each mailbox can then have its own SharePoint site.
(Optional) Create a new Microsoft PowerApp environment
This is a recommended step, but completely optional. If you’d rather not install a new PowerApp environment, skip to the ‘install the automation’ section.
-
Sign in to the Power Platform admin centre – you must be a Dynamics 365 admin, Global admin, or Power Platform admin to set up a new environment (Image 10).
-
In the navigation pane, select Environments, and then select New (Image 11).
-
On the next page (image 12), give your environment a Name (for example, [Your LPA name Consultation responses].
-
Leave Make this a Managed Environment as No.
-
Leave Group as unselected.
-
Select your Region as UK.
-
Select Production for Type.
-
Define Purpose. You can leave this blank, but otherwise specify it is for the consultation flow.
-
Select No for Add a Dataverse data store.
-
Select No for Pay-as-you-go with Azure.
-
Press Save to create your environment.
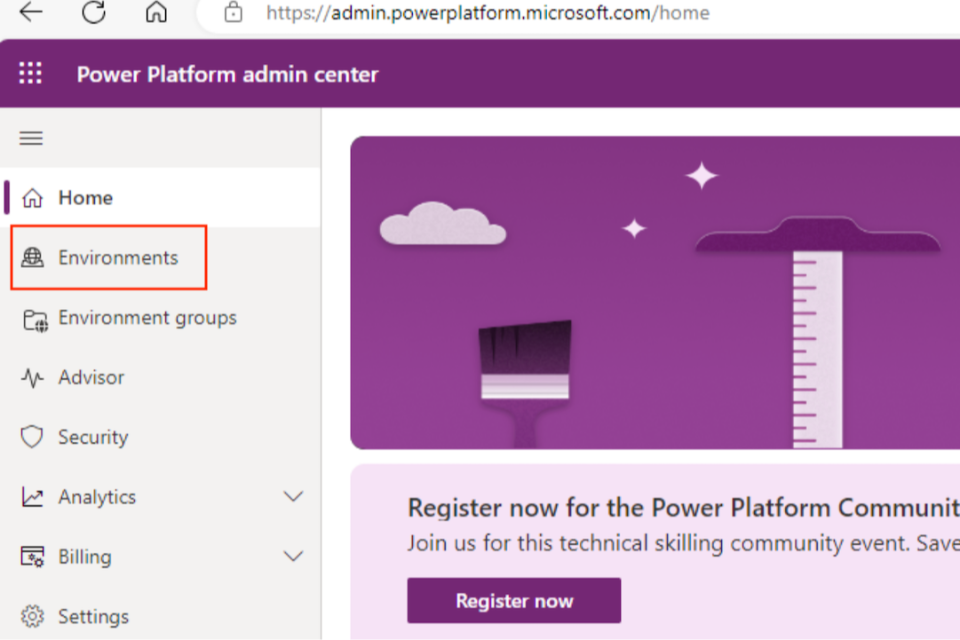
Image 10 – sign in to Power Platform and select Environments
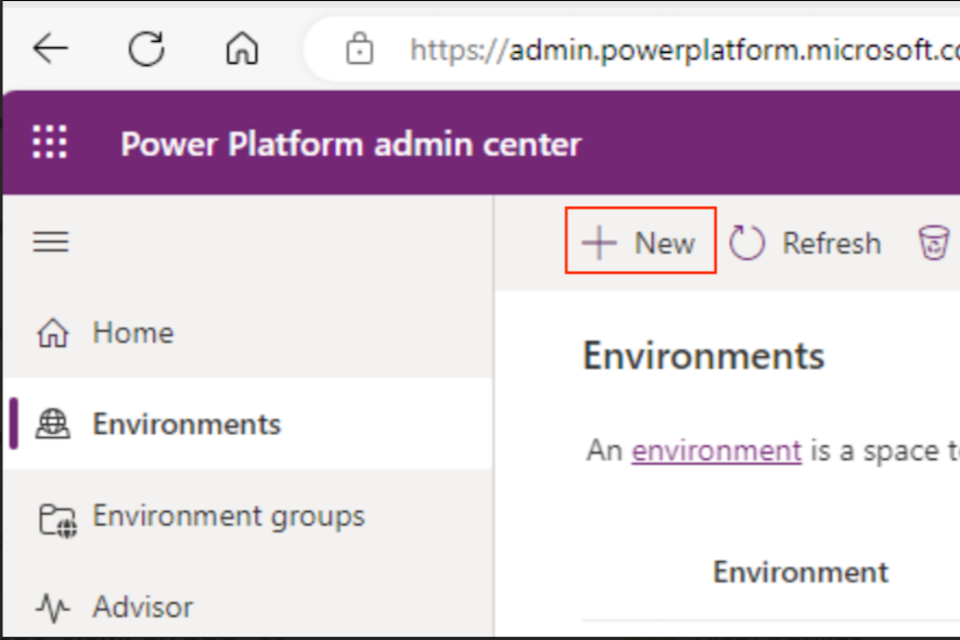
Image 11 – select New
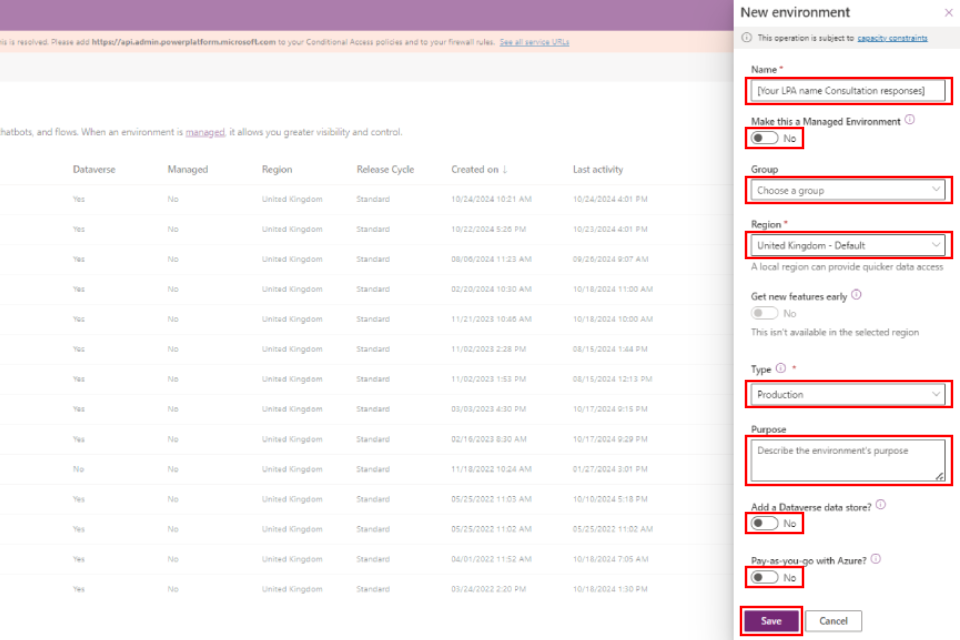
Image 12 – fill out Environment details
Install the automation
1. Add the automation to Power Apps
-
Sign in to Power Apps. If this is your first time using Power Apps, you may need to fill some contact information based on your preferences.
-
If you created a new environment to run the automation, use the dropdown menu at the top of the screen to change your environment to the one you created. If you did not create a new environment, you can skip this step – but make sure Personal productivity is the environment selected in the dropdown at the top of your screen (image 13).
-
Create a Solution.
-
Select Solutions from the left hand side menu.
-
If you see the screen shown in image 14, select Create a Database and follow the next 4 steps (image 15). Otherwise, skip to step 12.
-
Set Currency to GBP (£).
-
Set Language to English (United States) – British English is not currently supported.
-
Leave the Include sample apps and data option checked.
-
Select Create my database. This will take a moment to load.
-
Select Import Solution at the top of the page (Image 16).
-
In the pop-out on the right-hand side of the page, select Browse, find the zip file in your downloads folder, and select the zip file.
-
Select Next to add the automation to Power Platform. This will take a moment to load.
-
Select Next. This will load the connections, which will take a moment (image 17).
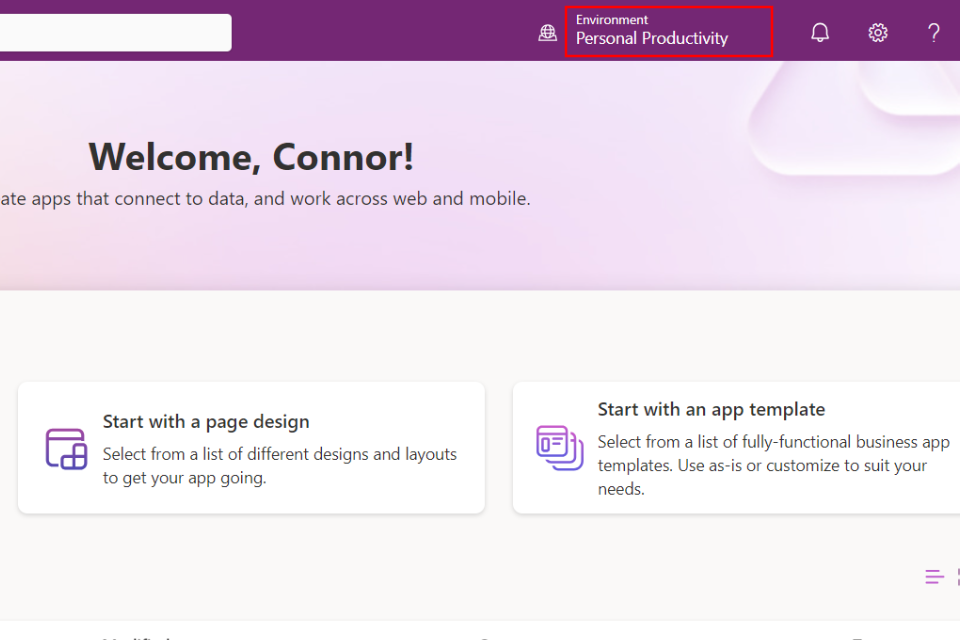
Image 13 - select Personal productivity environment
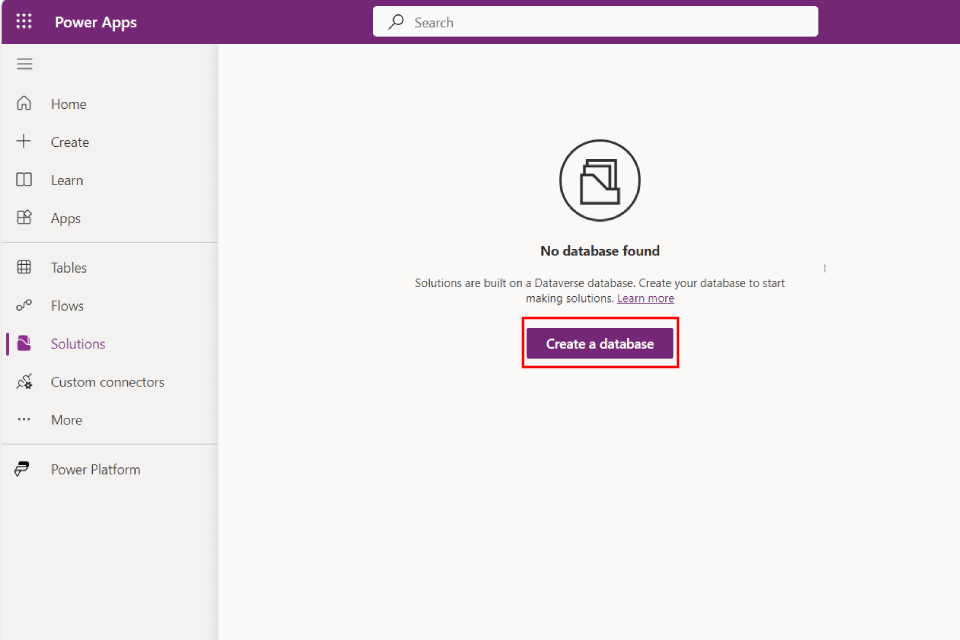
Image 14 – select Create a database
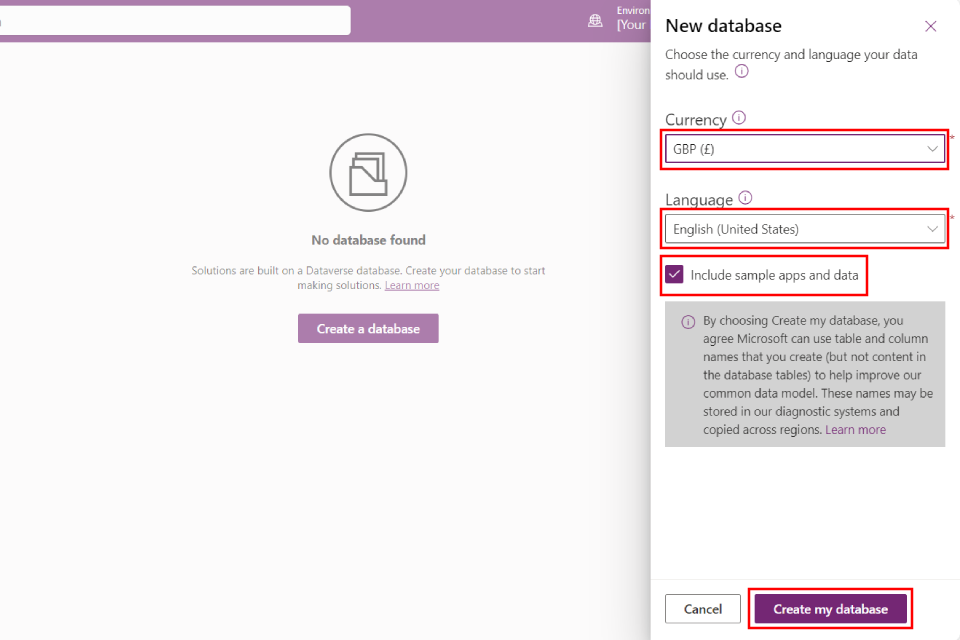
Image 15 - select Create my database
Image 16 – import Solution
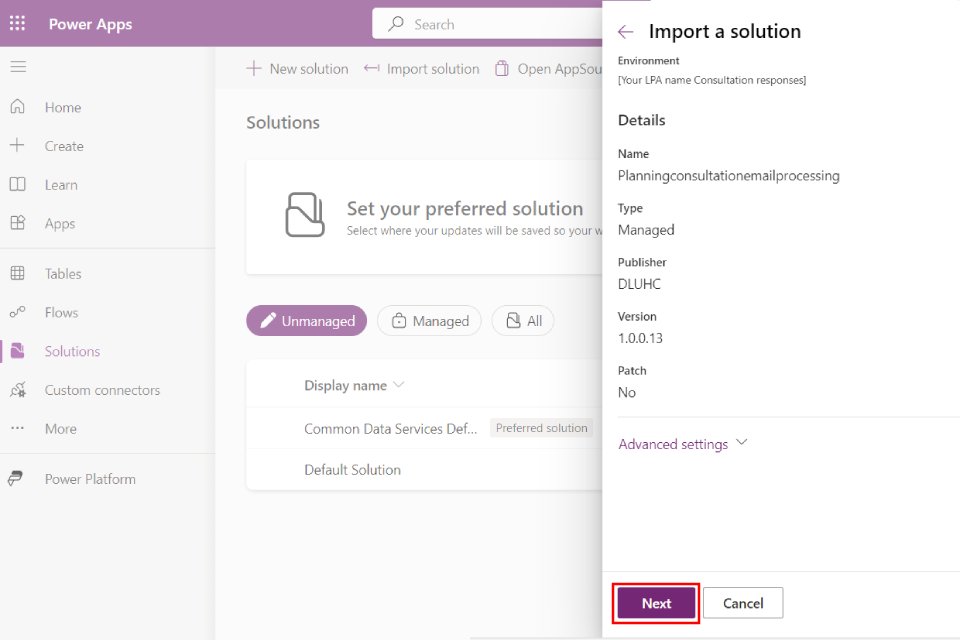
Image 17 – select Next
2. Connect the automation to your database
-
Before selecting Next, select the three dots beside Planning Consultation Mailbox and select Add new connection (Image 18).
-
Select the account that has access to your shared mailbox. You’ll be prompted to sign in to this mailbox – you’ll need the password in order to do this.
-
Select Next to continue.
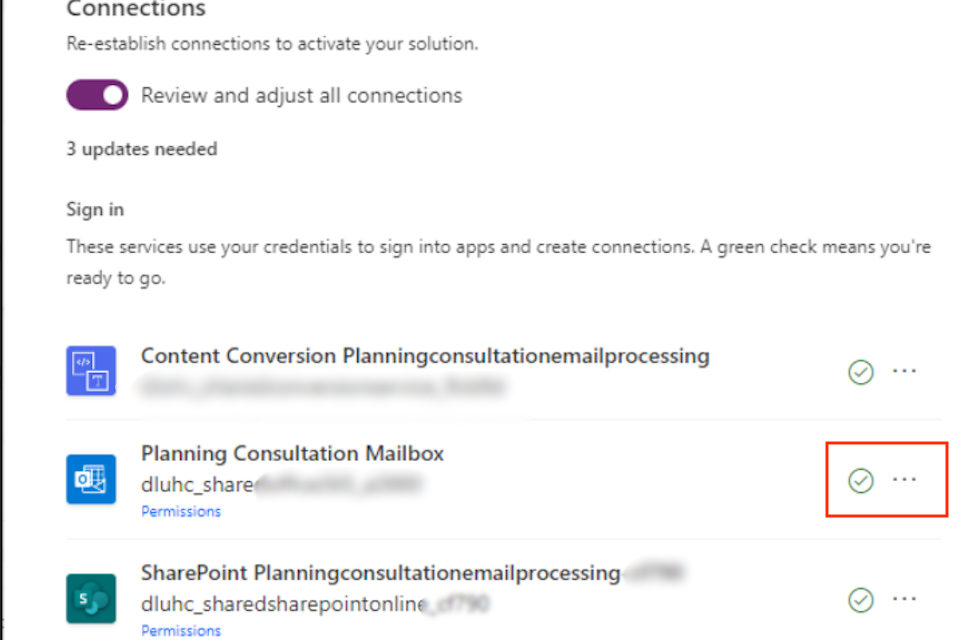
Image 18 – select the three dots and select Add new connection
3. Connect the automation to SharePoint
You do not need to create a new folder for this automation. The SharePoint list name field on this page (explained later in this step) will do this automatically.
The following steps may be in a slightly different order depending on your system (image 19).
-
Add the URL of the SharePoint site you created earlier to the SharePoint site URL field. It should be formatted like below and must not include a “/” or any other special characters at the end: https://[orgname].sharepoint.com/sites/[site name] – for example, https://repscouncil.sharepoint.com/sites/repsconsultation
-
If you’re using an existing site, add its URL in the format https://[orgname].sharepoint.com/sites/[site name] – for example https://repscouncil.sharepoint.com/sites/repsconsultation – to the SharePoint site URL field.
-
Choose an appropriate list name (for example, [your LPA name] Consultation responses) and add it to the SharePoint list name field. Once you select Import below, your list name will be automatically generated and displayed on the left hand side navigation of your SharePoint site.
-
Enter the shared mailbox email address in the Shared mailbox address field.
-
You can also turn on automatic responses. These are pre-written automatic replies to emails sent to your consultation inbox. Responses are sent once a day in bulk. To turn these on, select Yes for Email Acknowledgement Required.
-
Choose which mailbox folder you’d like the automation to run from – this will usually be the Inbox, but if you’ve set up rules to automatically forward responses to a different folder, you can change it.
-
Select Import and wait until the “Currently importing” message at the top of your screen turns into a green bar, which tells you the import has been successful.
The automation should now be installed, and you can turn on and run it.
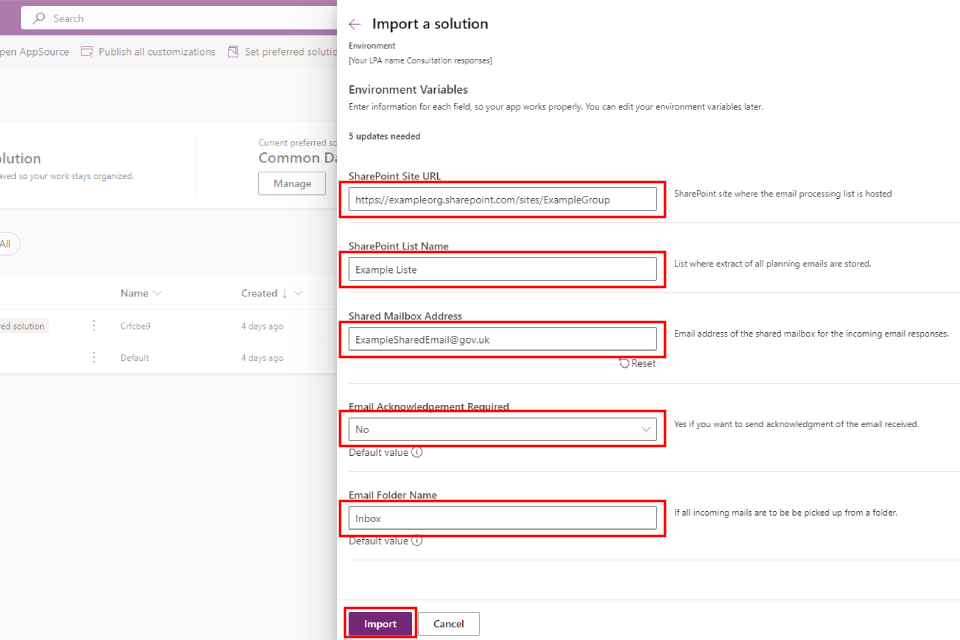
Image 19 - connect the automation to SharePoint
Turn on and run the automation
If everything is installed correctly, you should now be able to turn on the automation.
-
Select Solutions and change the view to show Managed solutions (image 20).
-
Select Planning consultation email processing to open to solution (image 20).
-
Once the solution is open, select Planning consultation email processing within the solution. This will open the specific flow (Image 21).
-
There is a Turn on button at the top of your screen – if the installation has been successful, this button will automatically change to say Turn off (Image 22).
-
When you’re no longer accepting responses to your consultation, make sure to turn off the automation by selecting the Turn off button.
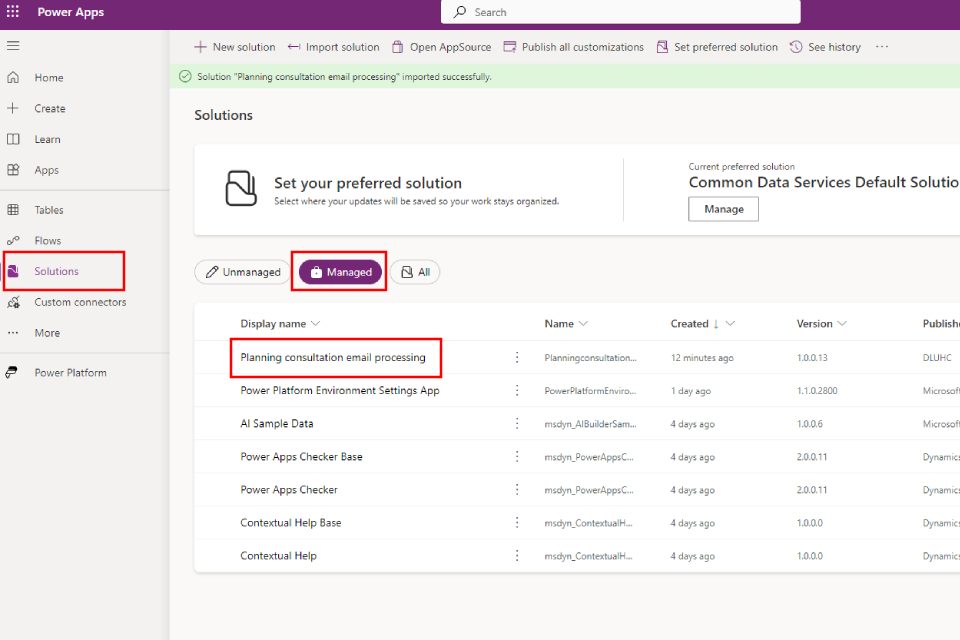
Image 20 – change the view to Managed solutions
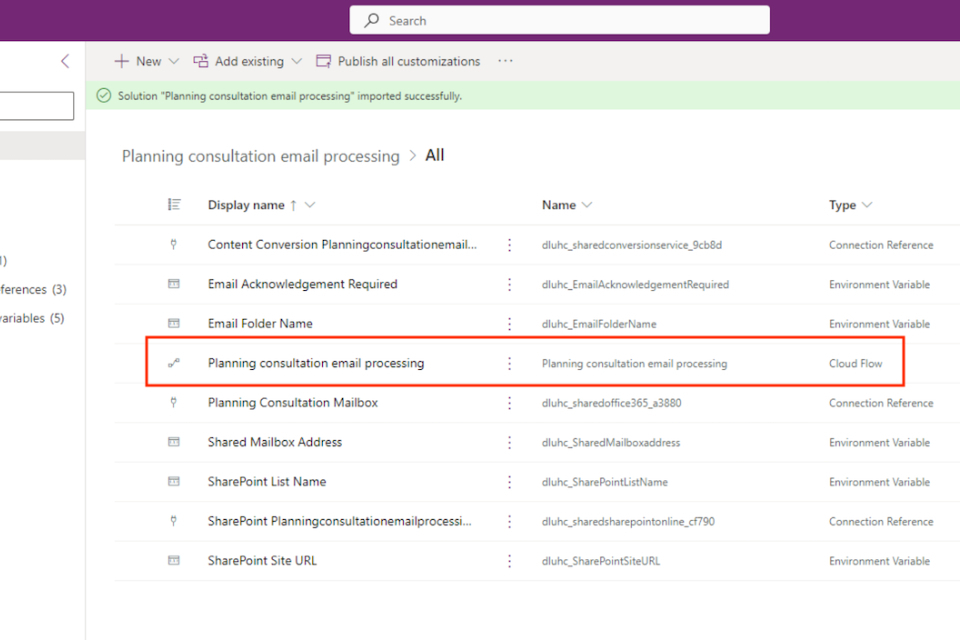
Image 21 – select Planning consultation email processing within the solution
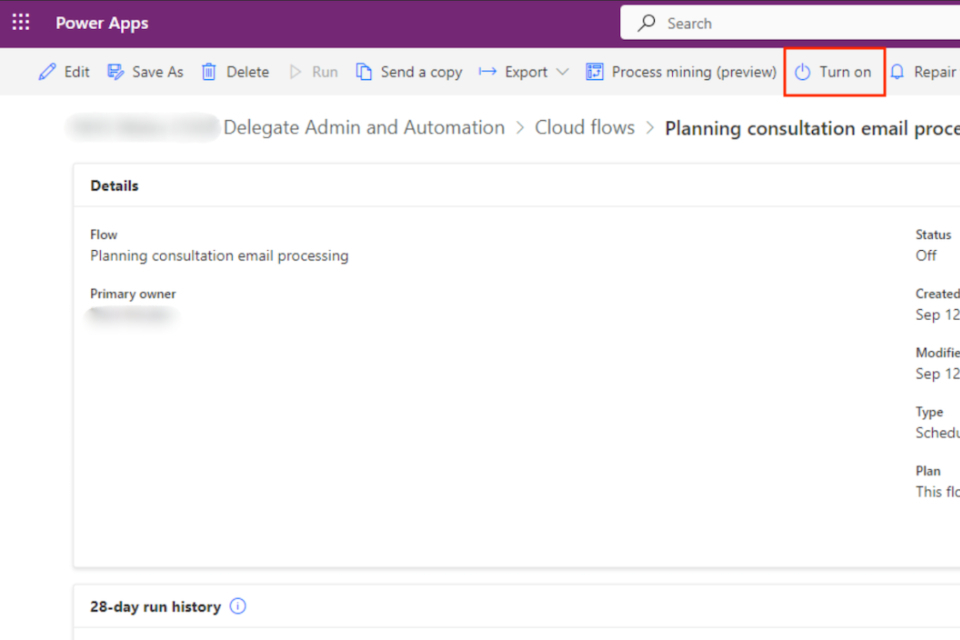
Image 22 – turn the automation on
Test that the automation works
To test the automation is working correctly, send an email, including an attachment, to the email address you attached it to.
-
Return to the screen where you ensured that the flow was turned on.
-
Press the Run button at the top of the screen and select the Next button that will appear in the sidebar (image 25).
This will manually run the automation (which usually runs once a day). You can manually run the automation whenever you choose to test it or if you’d like to pull emails into the database outside of the normal run time.
You should be able to see the run history on your Power Platform page. The run request you’ve just made will say Running.
-
Use the Refresh icon if there is a delay between the run completing and the status automatically updating.
-
Once the run request has completed, the status should say Succeeded (Image 24).
You can now go back to the SharePoint site you linked to the automation.
-
Select the Settings gear icon.
-
Select Site contents.
-
Select the list name you specified in the SharePoint list name field during setup. You should see a table with the following columns: reference, email address, status, date and time, subject line, email link, email text, attachments.
If your automation is working, you should see the data from your test email in the table, along with any other unread emails in your shared mailbox.
If you selected automatic responses, you should also receive an email acknowledgement back to your email address.
If the automation is not working, or the run request says Failed next to it, select the run request.
You’ll see a flow chart, which should have green ticks against every part of the flow that was successful. Finding the parts of the flow chart that were not successful should help you troubleshoot the issue.
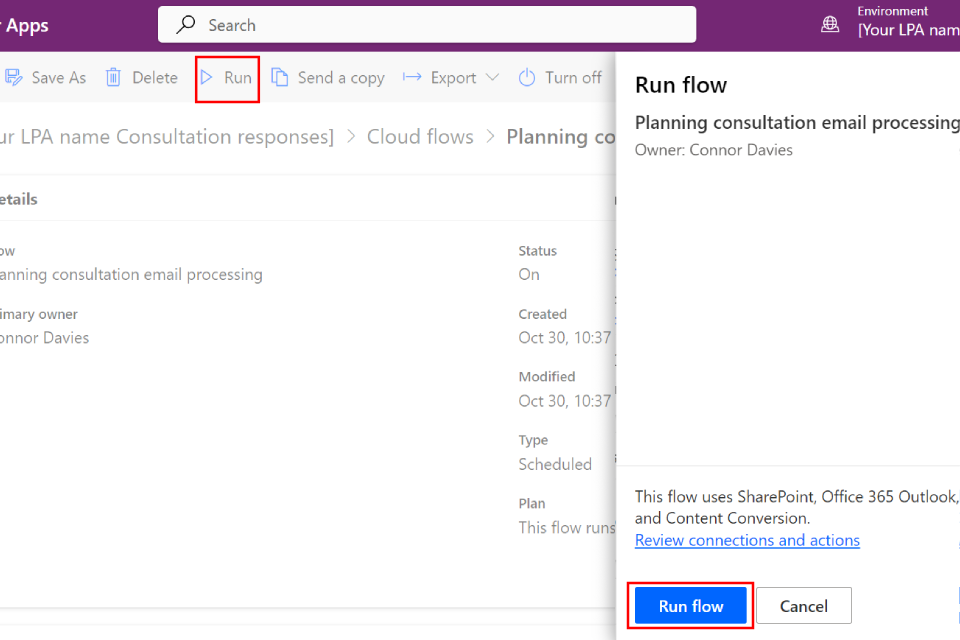
Image 23 – select Run and then Next
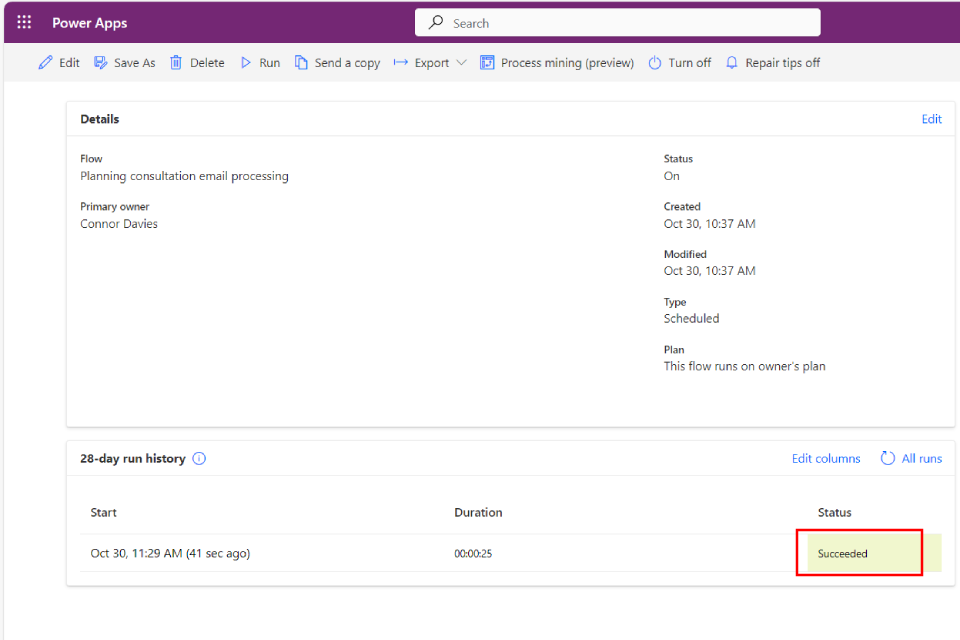
Image 24 – once the run request has completed, the status should say Succeeded
Turn off the automation
When you’re no longer accepting responses to your consultation, make sure to turn off the automation.
-
Go to Power Apps.
-
Go to Solutions.
-
Choose Managed, then select Planning consultation email processing.
-
Select the Turn off button – if this has been successful, it will turn into a Turn on button (Image 25).

Image 25 – turn the automation off or on
Using the automation for multiple consultations
If you want to use the solution across multiple consultations for one Local Plan, turn the automation back on when consultation reopens. The responses will be added to the same list as for your previous consultation.
If you want to have different lists and folders for each consultation, you need to uninstall the automation and install it again.
Uninstall the automation
If for any reason you no longer want to use the automation, or you need to reinstall it because of an issue, you can follow these steps.
-
Go to Power Apps, and select Solutions.
-
Choose Managed at the top of the list, then select Planning consultation email processing.
-
Select the three dots next to Planning consultation email processing and select Delete.
-
Confirm you would like to remove this solution – once you’ve done this, it will remove the solution from your Power Apps environment.
-
To remove the lists created by the automation, navigate to your SharePoint URL.
-
Select the Settings gear icon then select Site contents.
-
In the Site contents page there will be a folder called Planning Consultation Emails. Select the three dots next to this and select Delete. This will remove all sub-folders contained within this folder.
-
On the same screen, select the three dots next to the list name you created during set-up, then select Delete. This will remove all sub-folders contained within this list.
Share your feedback
If you implement the automation yourself, we’d like to hear your feedback and any suggestions for improvement. You can share your thoughts at digitalplanningteam@communities.gov.uk