Guidance
HM Land Registry portal: update a user account
How Business e-services customers (business unit administrator role) can update an account through the portal.
Applies to England and Wales
Search user accounts
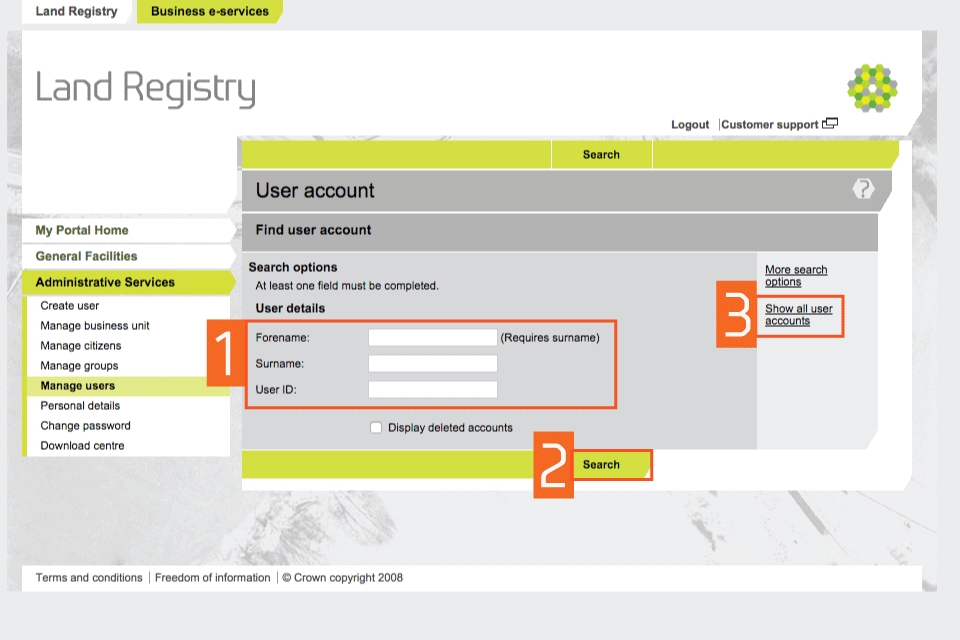
Select ‘Administrative Services’, then ‘Manage users’.
- Enter a ‘Surname’ or ‘User ID’ (Username). If your business unit has more than one person with the same surname, enter their ‘Forename’ to narrow the search results.
- Select ‘Search’.
- Alternatively, select ‘Show all user accounts’ to see all accounts associated with your business unit.
View user account details
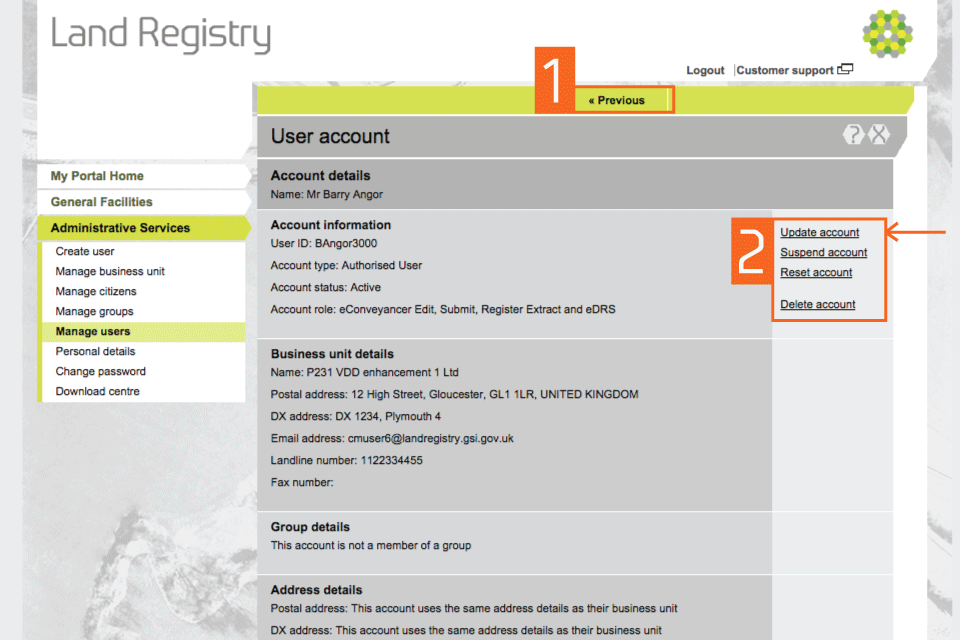
- If you selected ‘Show all user accounts’, identify the account you want to reset and select it.
- Select ‘Update account’ from the drop down menu. Then select ‘Next’.

Update an account
- Check the account details shown to make sure it’s the account you want. If it’s not, select ‘Previous’ and search again.
- Select ‘Update account’.
Change a role
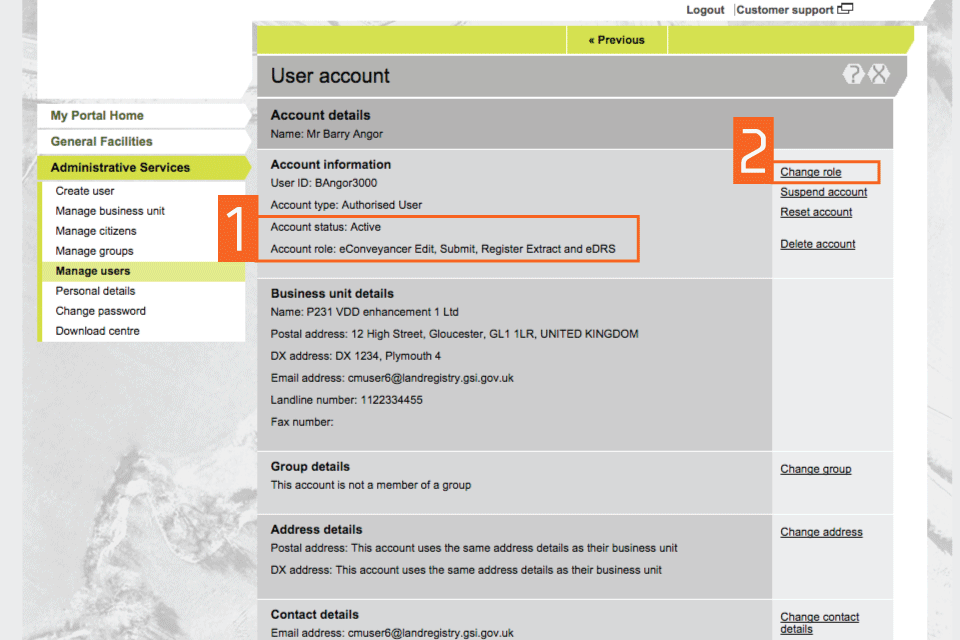
- The user’s ‘Account role’ is shown, eg ‘eConveyancer Edit, Submit, Register Extract and eDRS’.
- If you need to change the user role, select ‘Change role’.
Select a different user role
- Select one of the ‘User roles’ from the drop down menu, eg ‘Lender with e-DS1’.
- Select ‘Save’.

Change a role confirmation
- A message confirms that the account has been updated.
- Select ‘Return to user’ to return to the account details.

Change group
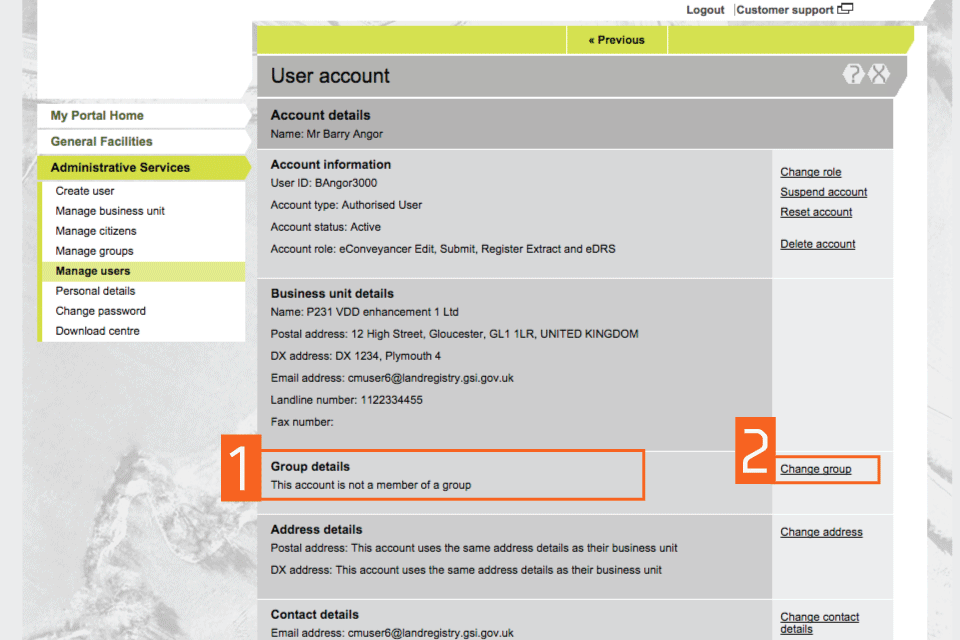
- This shows the updated group allocated to the user.
- Select ‘Change group’ to change the group that the user belongs to (if any).
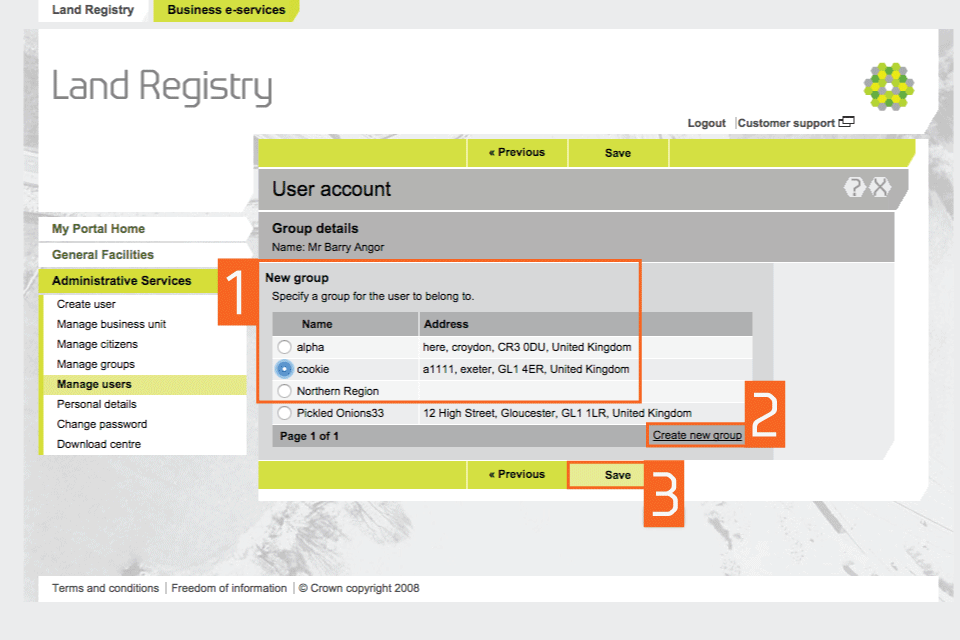
Change group details
- The ‘Group details’ show the name of the group that the user is associated with and also shows a list of all the groups connected to the business unit.
- If the group you need is not listed, select the guide ‘create a group of users’ to add the details.
- Select ‘Save’.
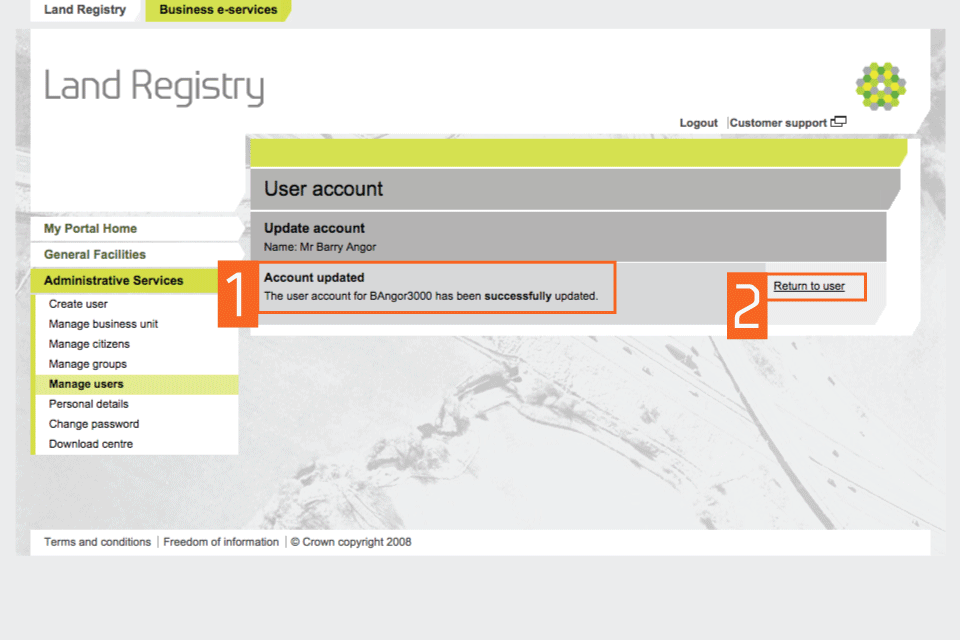
Change group confirmation
- This confirms that the changes have been made successfully.
- Select ‘Return to user’. This will show the user as a member of the new group you selected.
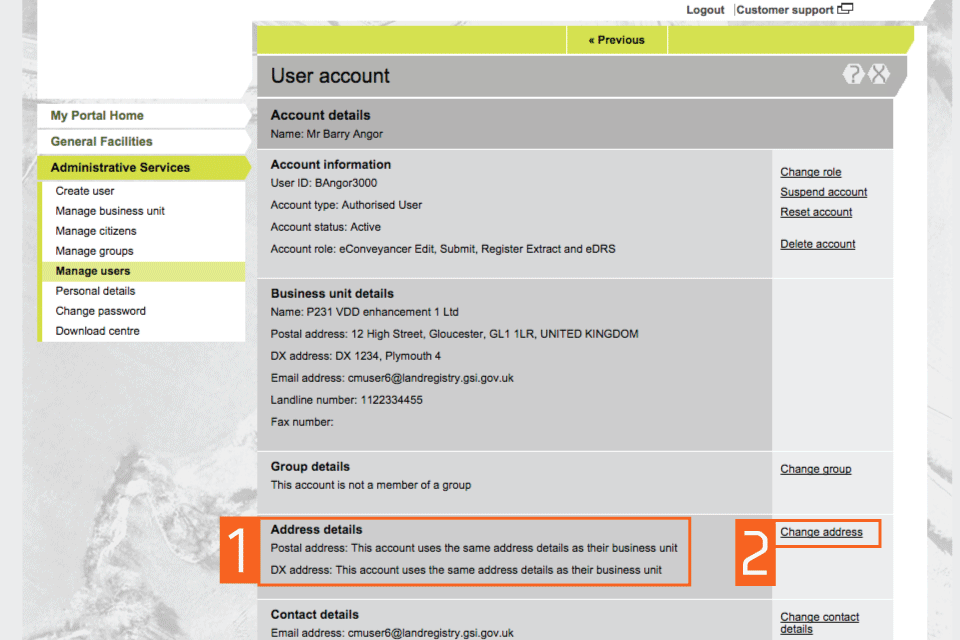
Change address
- The current address used is shown.
- Select ‘Change address’.
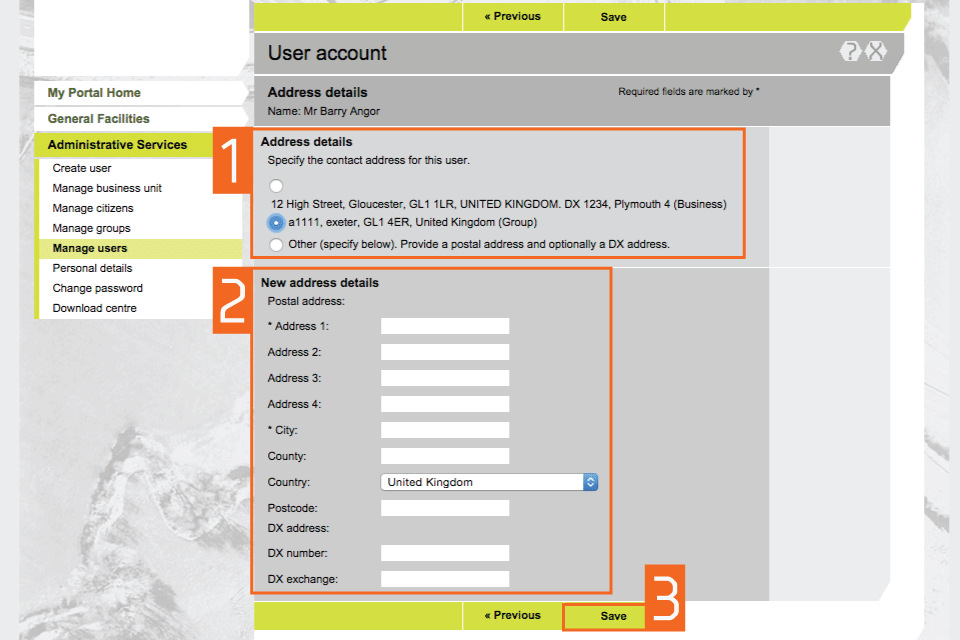
Change address details
- Select an address option: * select the address of the business unit * select the group address * select ‘Other’ to choose a new contact address
- If you choose ‘Other’, complete the ‘New address details’ section.
- Select ‘Save’. A message confirms that the account has been changed.
Change account details
From the ‘Account details’, select ‘Change contact details’.

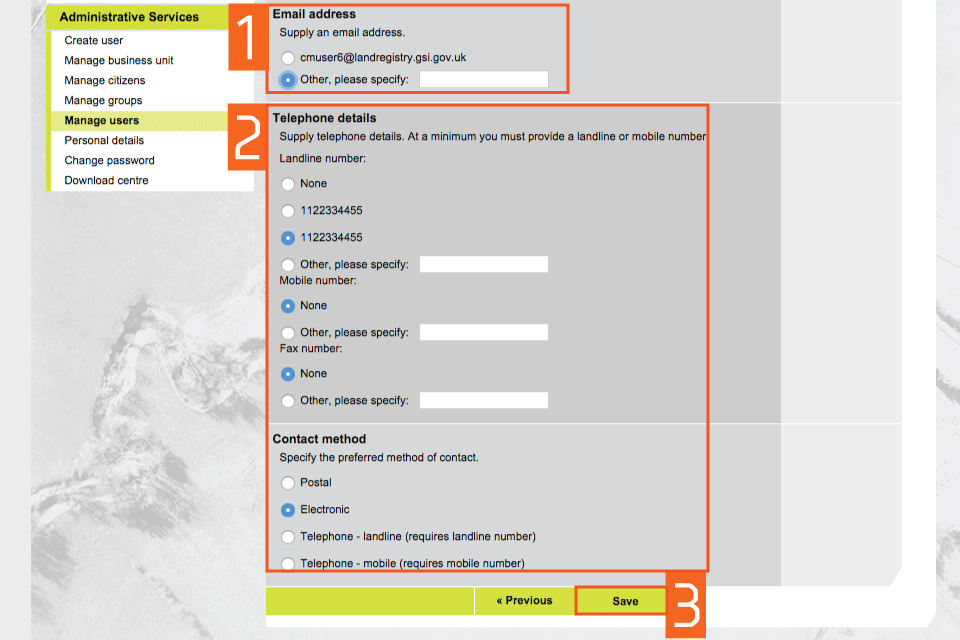
Update account details
- ‘Contact details can be updated by selecting one of the existing options displayed.
- If the contact number or email address you want is not shown, select ‘Other’.
- Select ‘Save’.
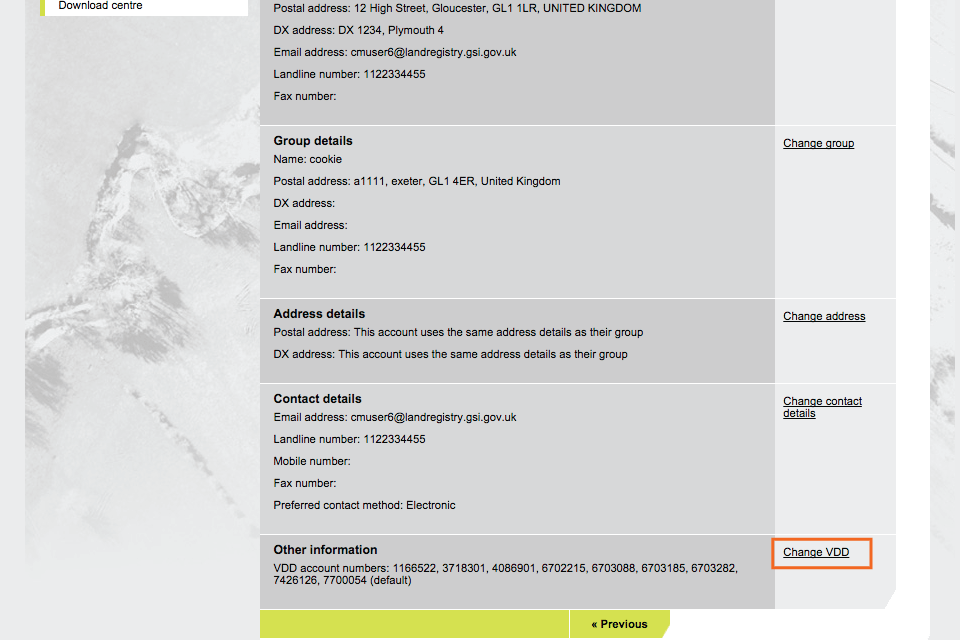
Change the Variable Direct Debit (VDD) account
The ‘Account details’ show the updated account. Select ‘Change VDD’.
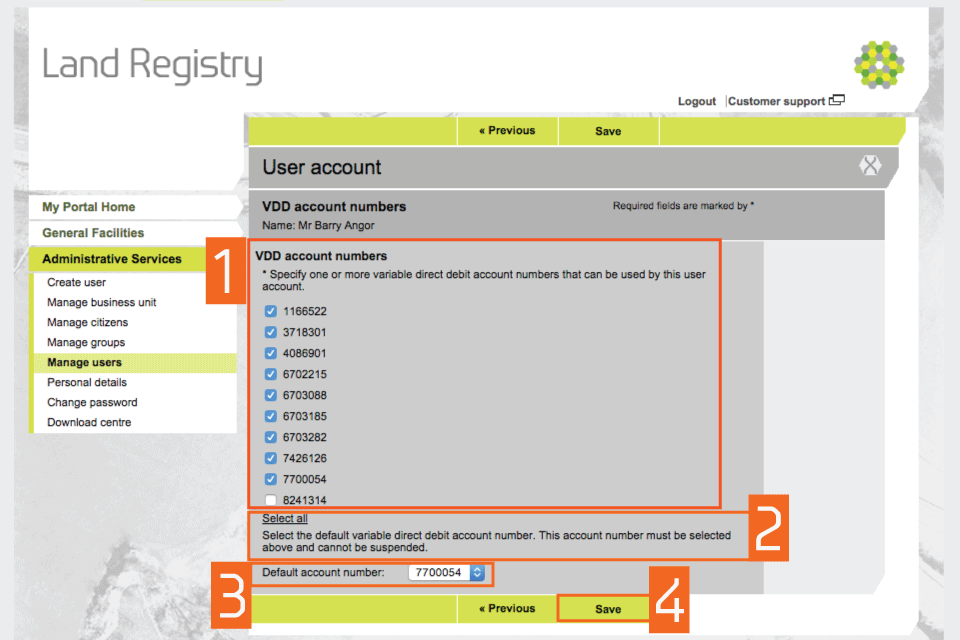
Update the VDD account
- This shows a list of ‘VDD account numbers’ associated with your business unit and you need to link at least one Variable Direct Debit account to it.
- You can also choose all of them by selecting ‘Select all’ at the bottom of the list.
- When you change a user’s ‘VDD account number’, make sure that the ‘Default account number’ is one of the ones selected in step 1.
- Select ‘Save’.
Logout
When you have completed your tasks, select ‘Logout’ at the top of the screen to exit the system securely.
Updates to this page
Published 19 October 2015